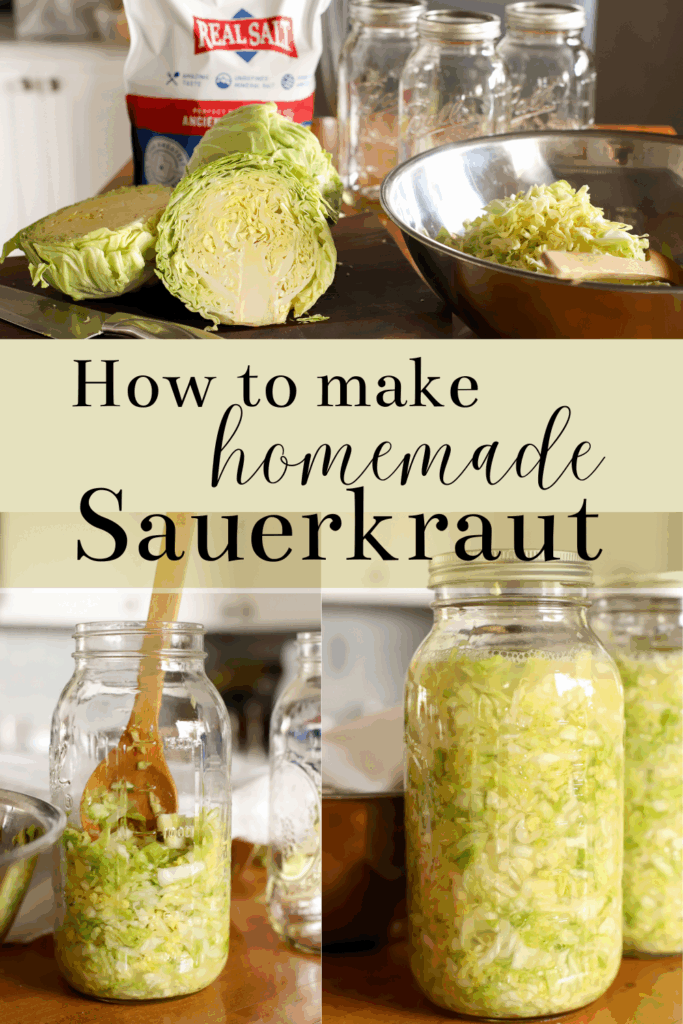
How To Make Homemade Sauerkraut
Fermenting Cabbage is one of the easiest skills to learn to add healthy, probiotic goodness into your family’s diet. Simply chop cabbage, salt it, put it in a jar, wait 7 days and voila! The best sauerkraut made right in your own home. In this post I share my step by step guide on How to Make Homemade Sauerkraut so that you can feel confident making it yourself. It’s soooo easy and you and your family will definitely enjoy it as much as we do!

How To Make Homemade Sauerkraut
Fermenting Cabbage is one of the easiest skills to learn to add healthy, probiotic goodness into your family's diet. Simply chop cabbage, salt it, put it in a jar, wait 7 days and voila! The best sauerkraut made right in your own home.
Ingredients
- 3 Medium Heads Of Organic Cabbage, finely shredded
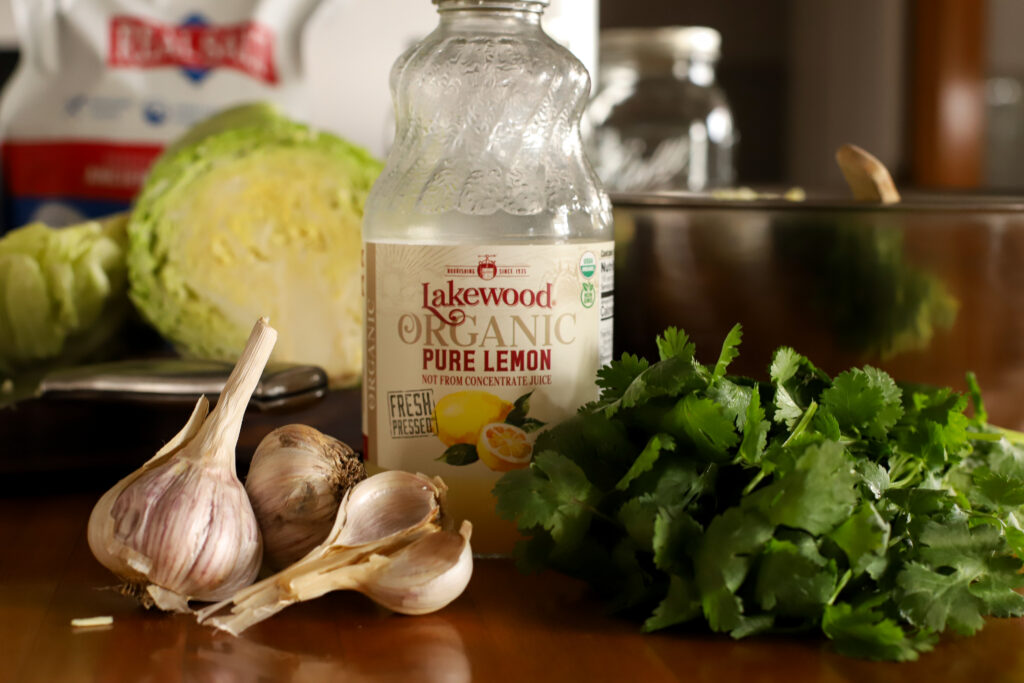
- 2 1/2-3 Tbsp. High Quality Salt (I use Redmond's)
- 4-6 Organic Garlic Cloves, minced
- 4 Tbsp Organic Lemon Juice
- Optional: Fresh Organic Cilantro, chopped
Instructions
- Gather your supplies. You will need: a cutting board, a sharp knife, 2 half gallon jars fermentation weights, a wooden spoon, a large bowl, and optional: a wide mouth canning funnel (makes filling jars easier)

- Begin by washing your jars and weights making sure everything is clean before you begin. You can wash jars in hot water with a splash of vinegar in the water or you can sterilize your jars in the dishwasher. Whatever you prefer.
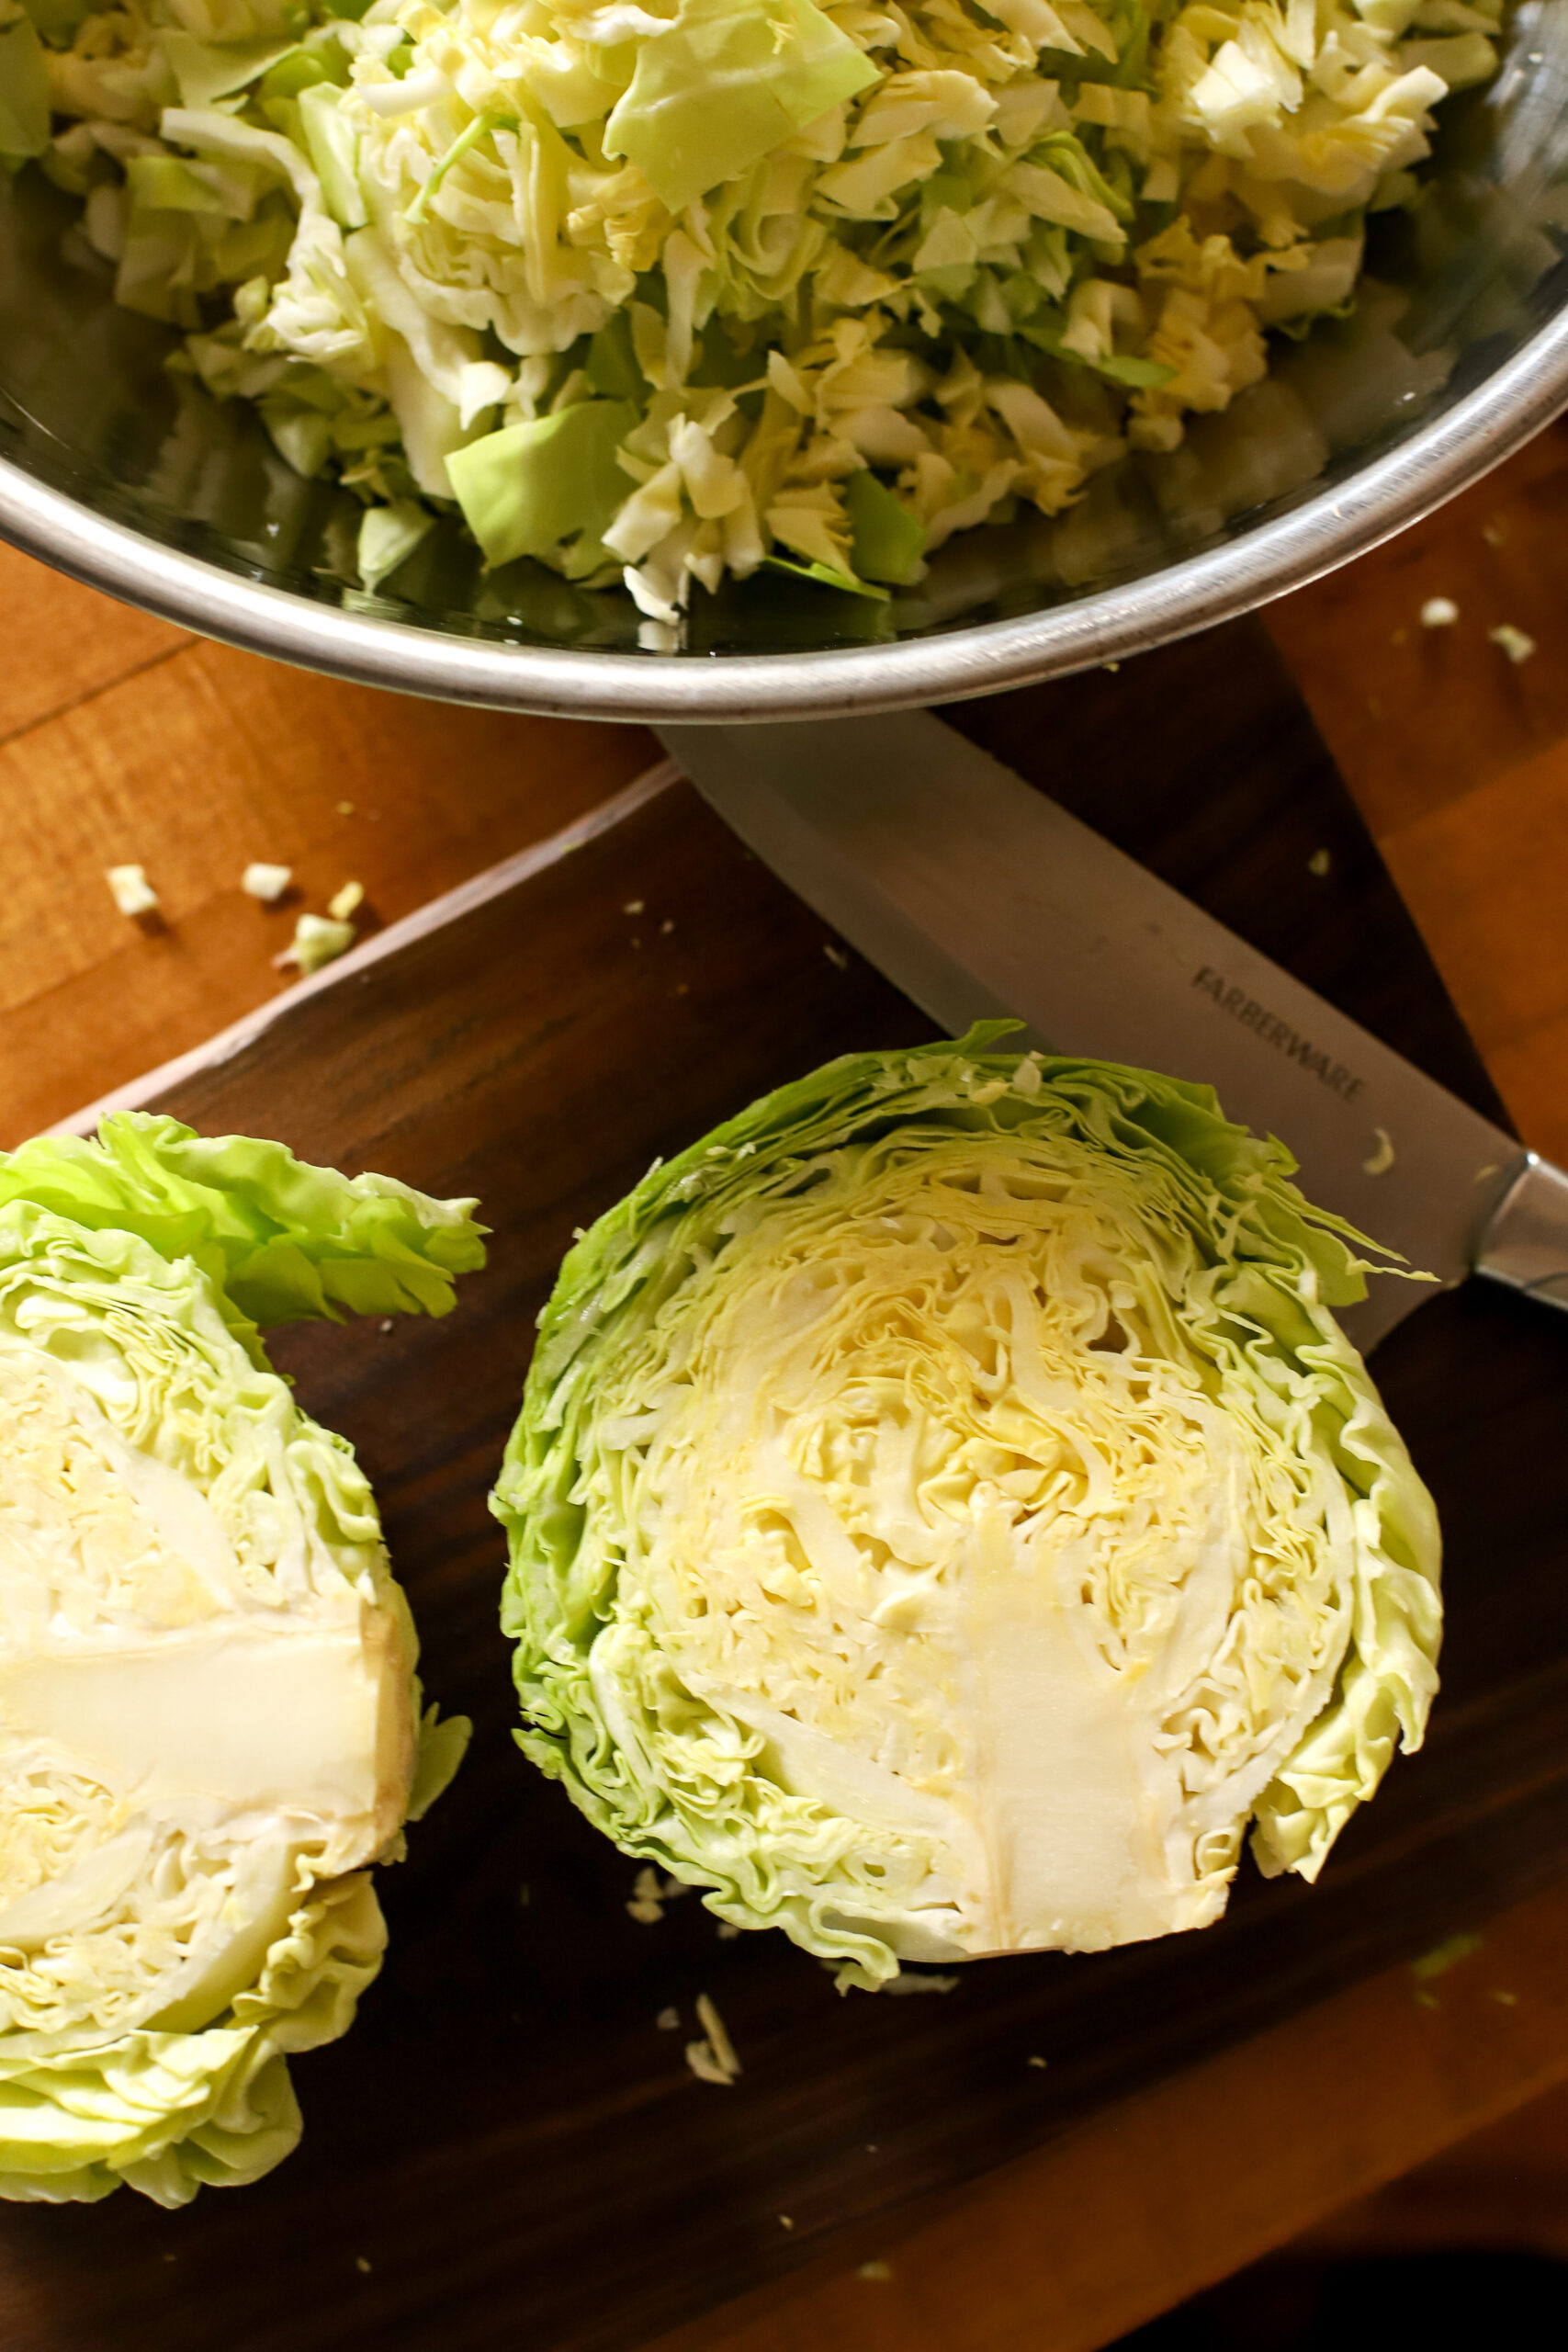
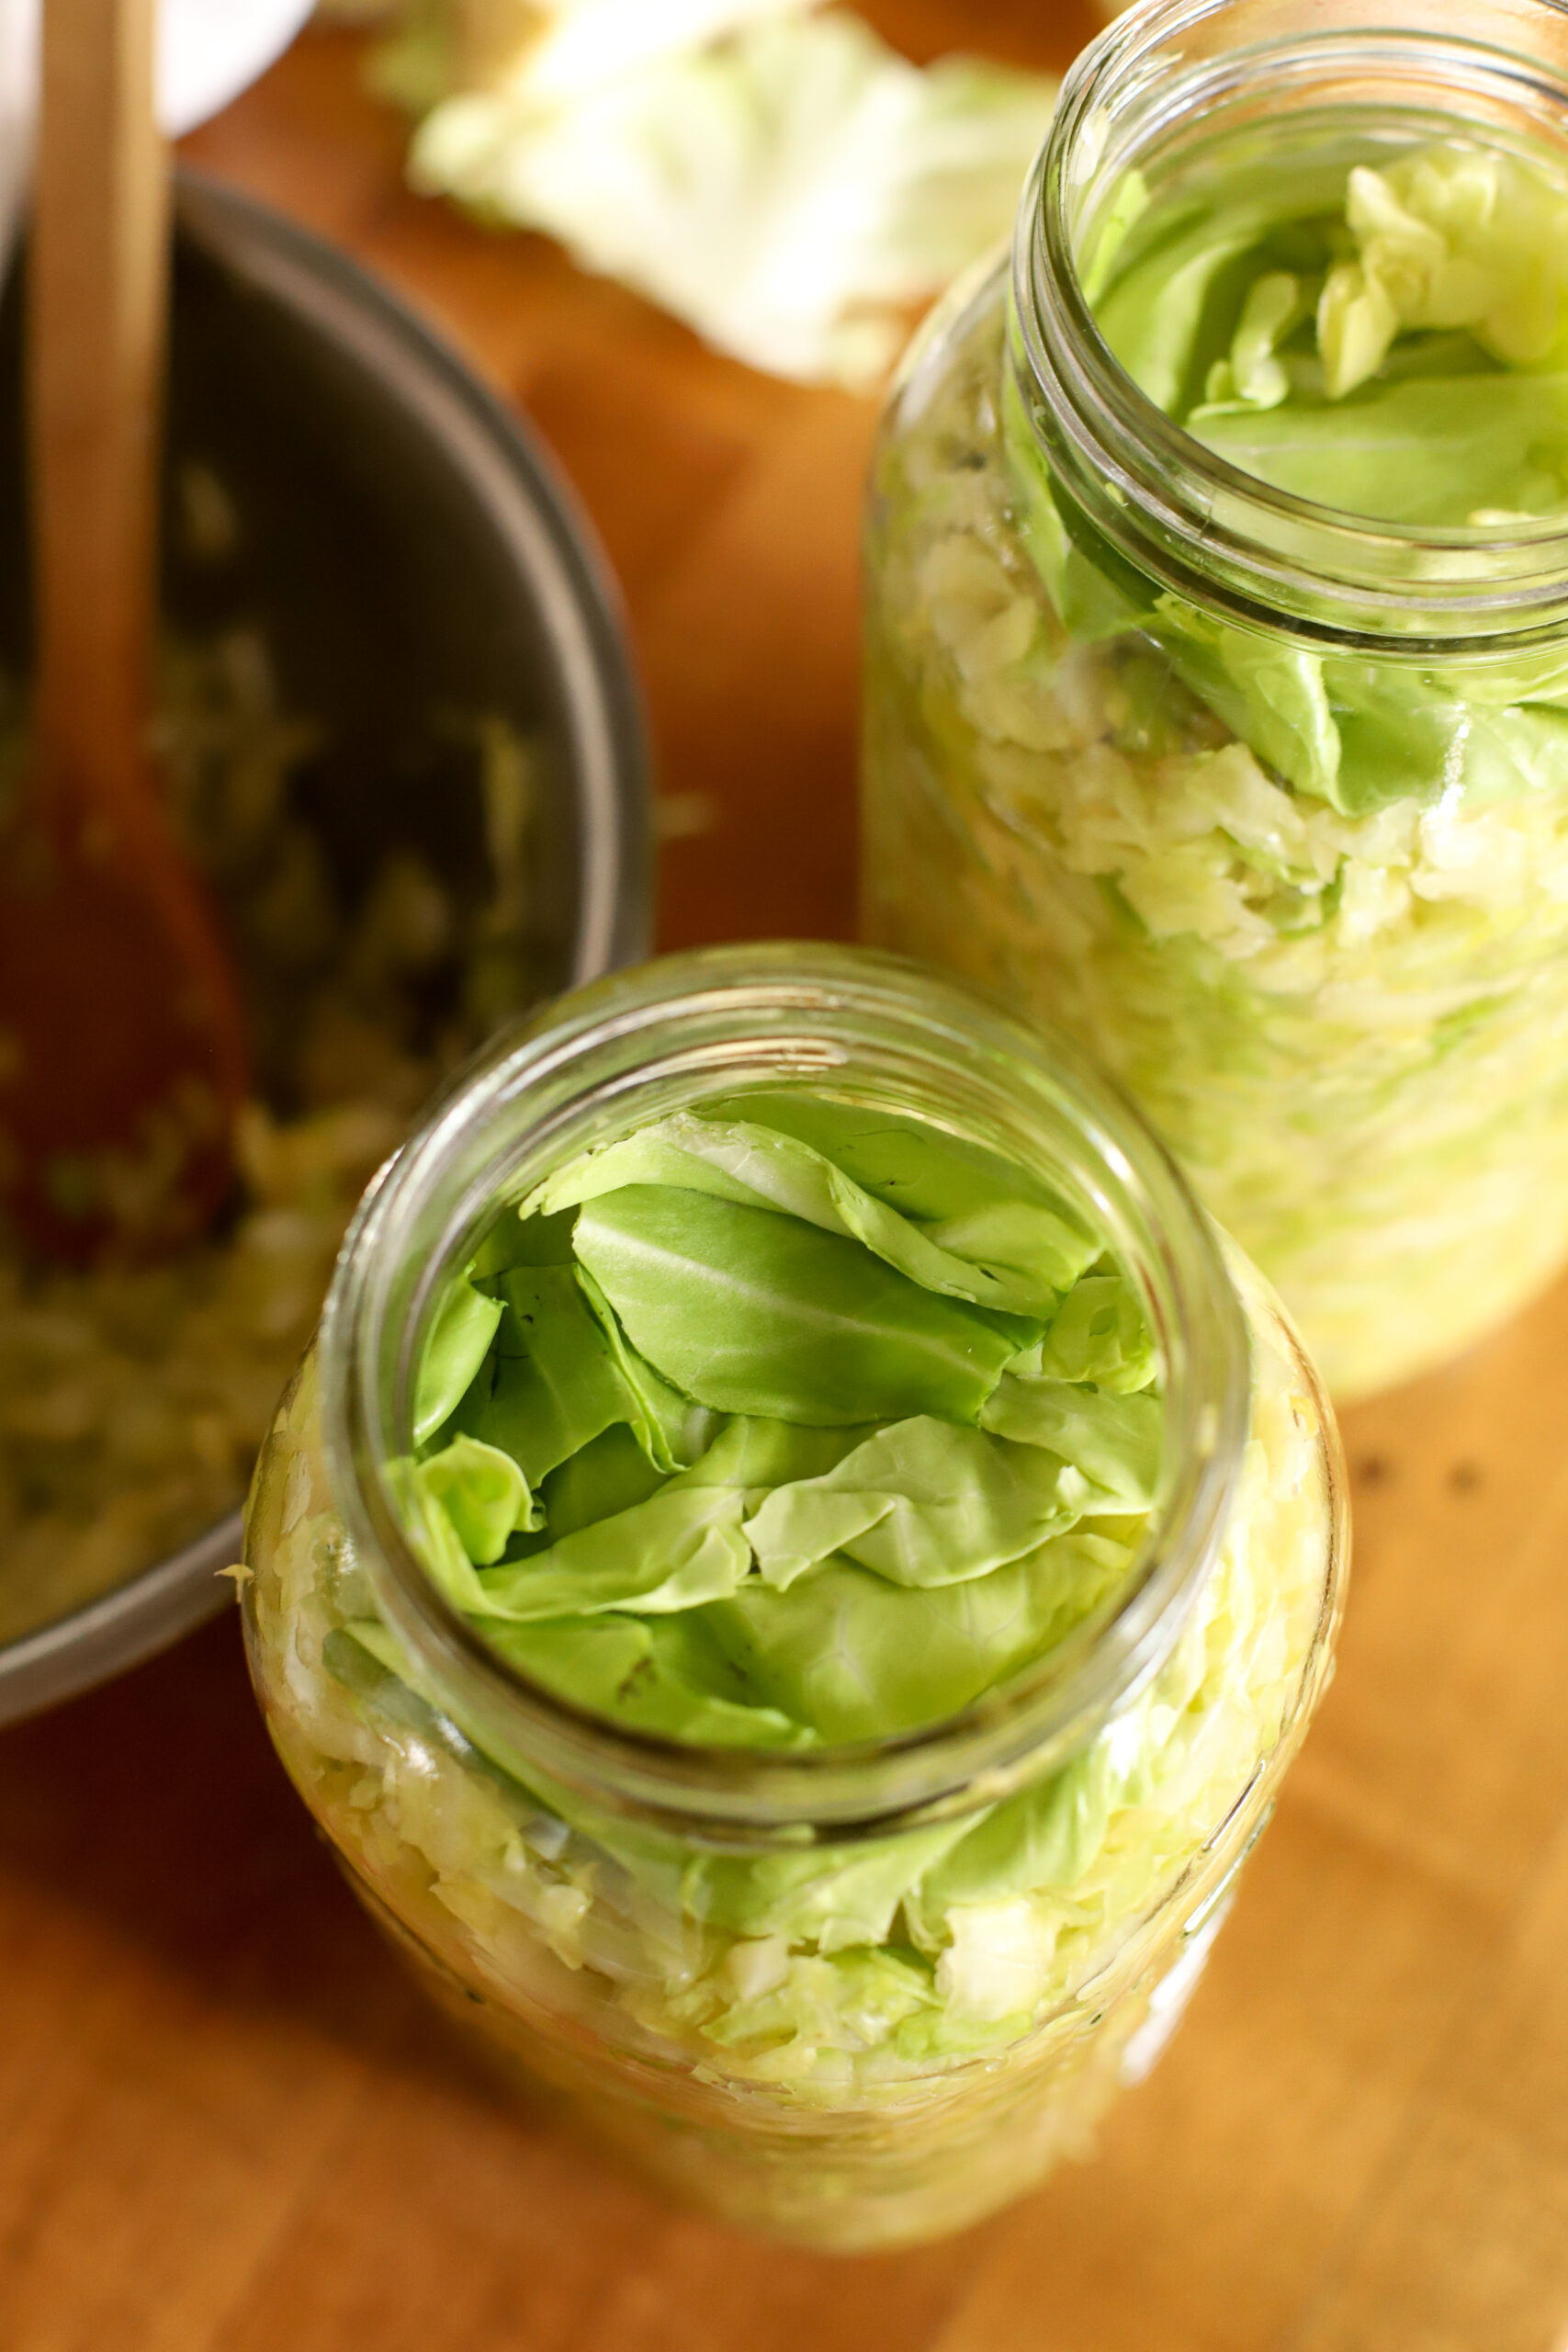
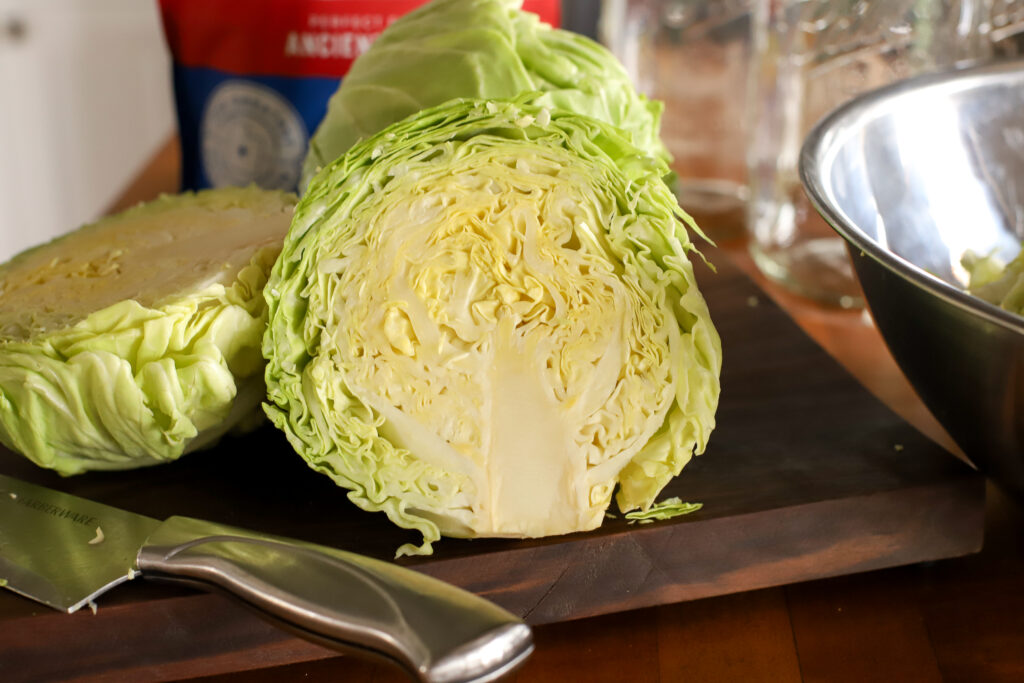
- Finely shred your cabbage and add it to a large bowl. Before shredding, set aside a large cabbage leaf for when the jars are filled.
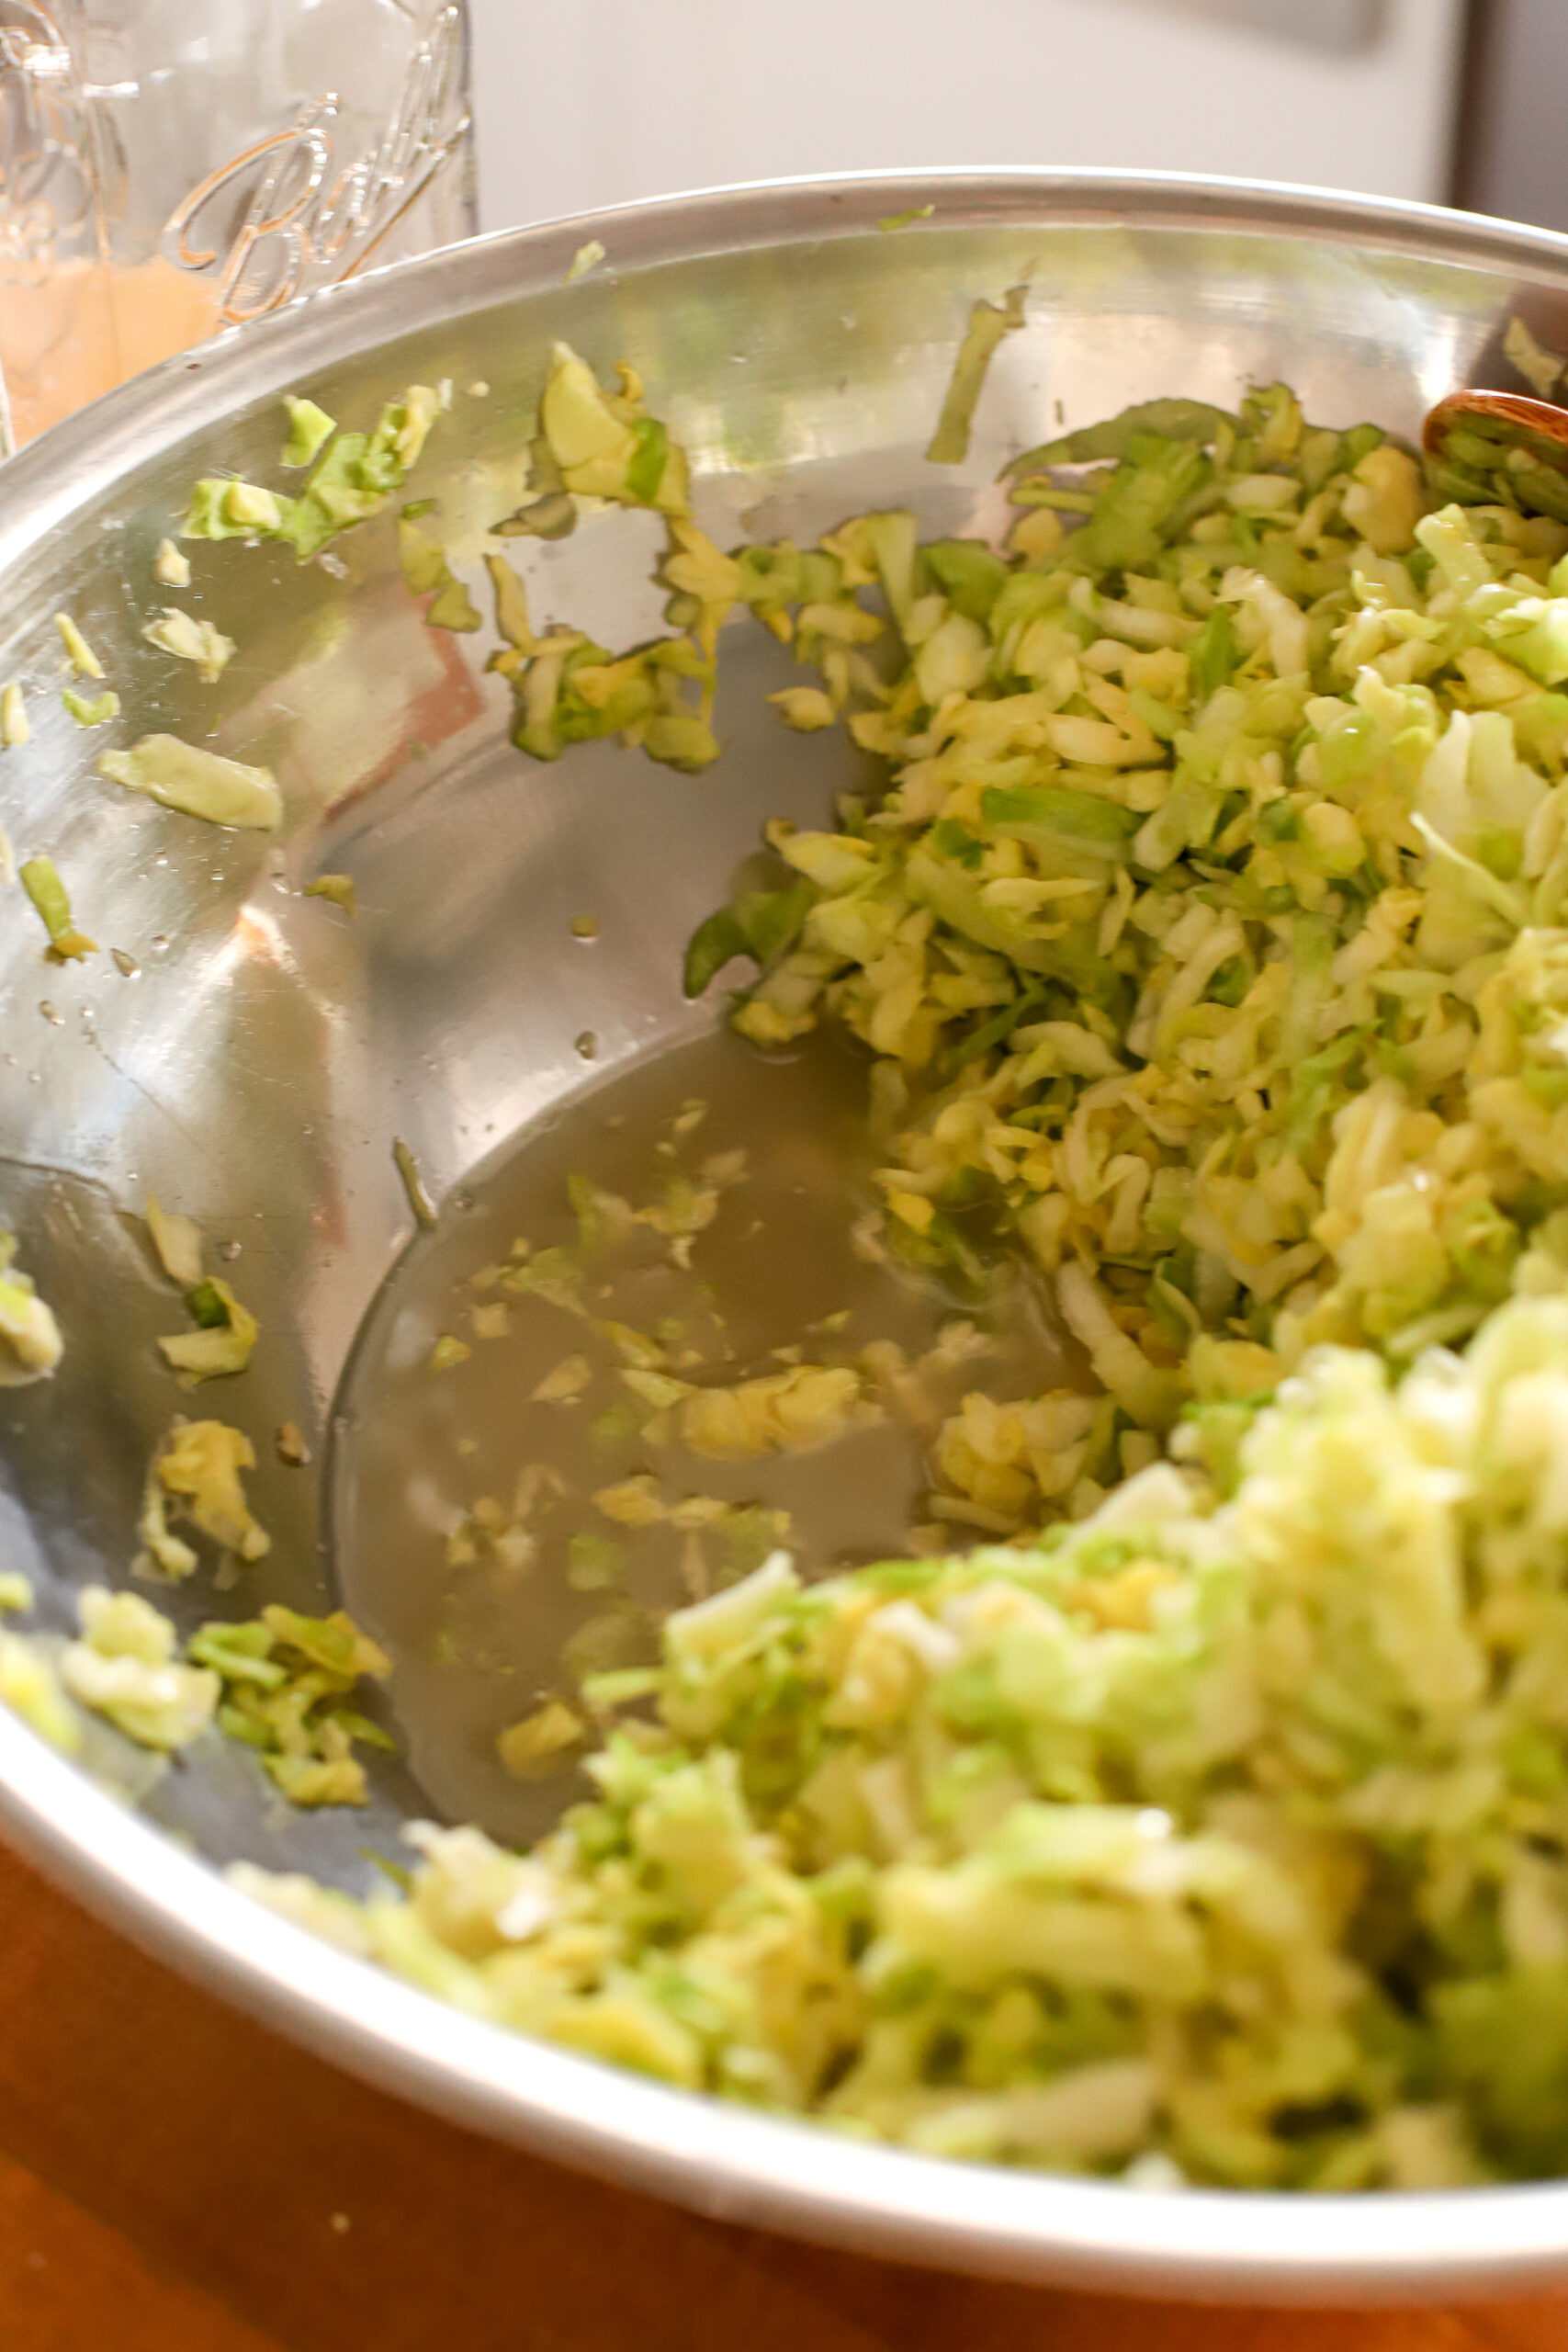
- Salt the cabbage with 2 1/2 Tbsp. salt and stir/pound cabbage with a spoon. You can also massage it with your hands although this is a lot messier. Taste your cabbage. What does it taste like? It is perfectly salted or does it taste like the ocean? We want the cabbage to be saltier than if you were going to eat this cabbage raw but we don't want it to be so salty that it is revoltingly salty. We want it to be overly salted enough that you can taste that there is too much salt but not so much salt we can hardly consume it. Chances are you will need slightly more salt to bring it to just the edge of too salty. Remember, we want it to taste like the ocean. Add more salt 1/2 Tbsp at a time until it reaches the correct salt level.
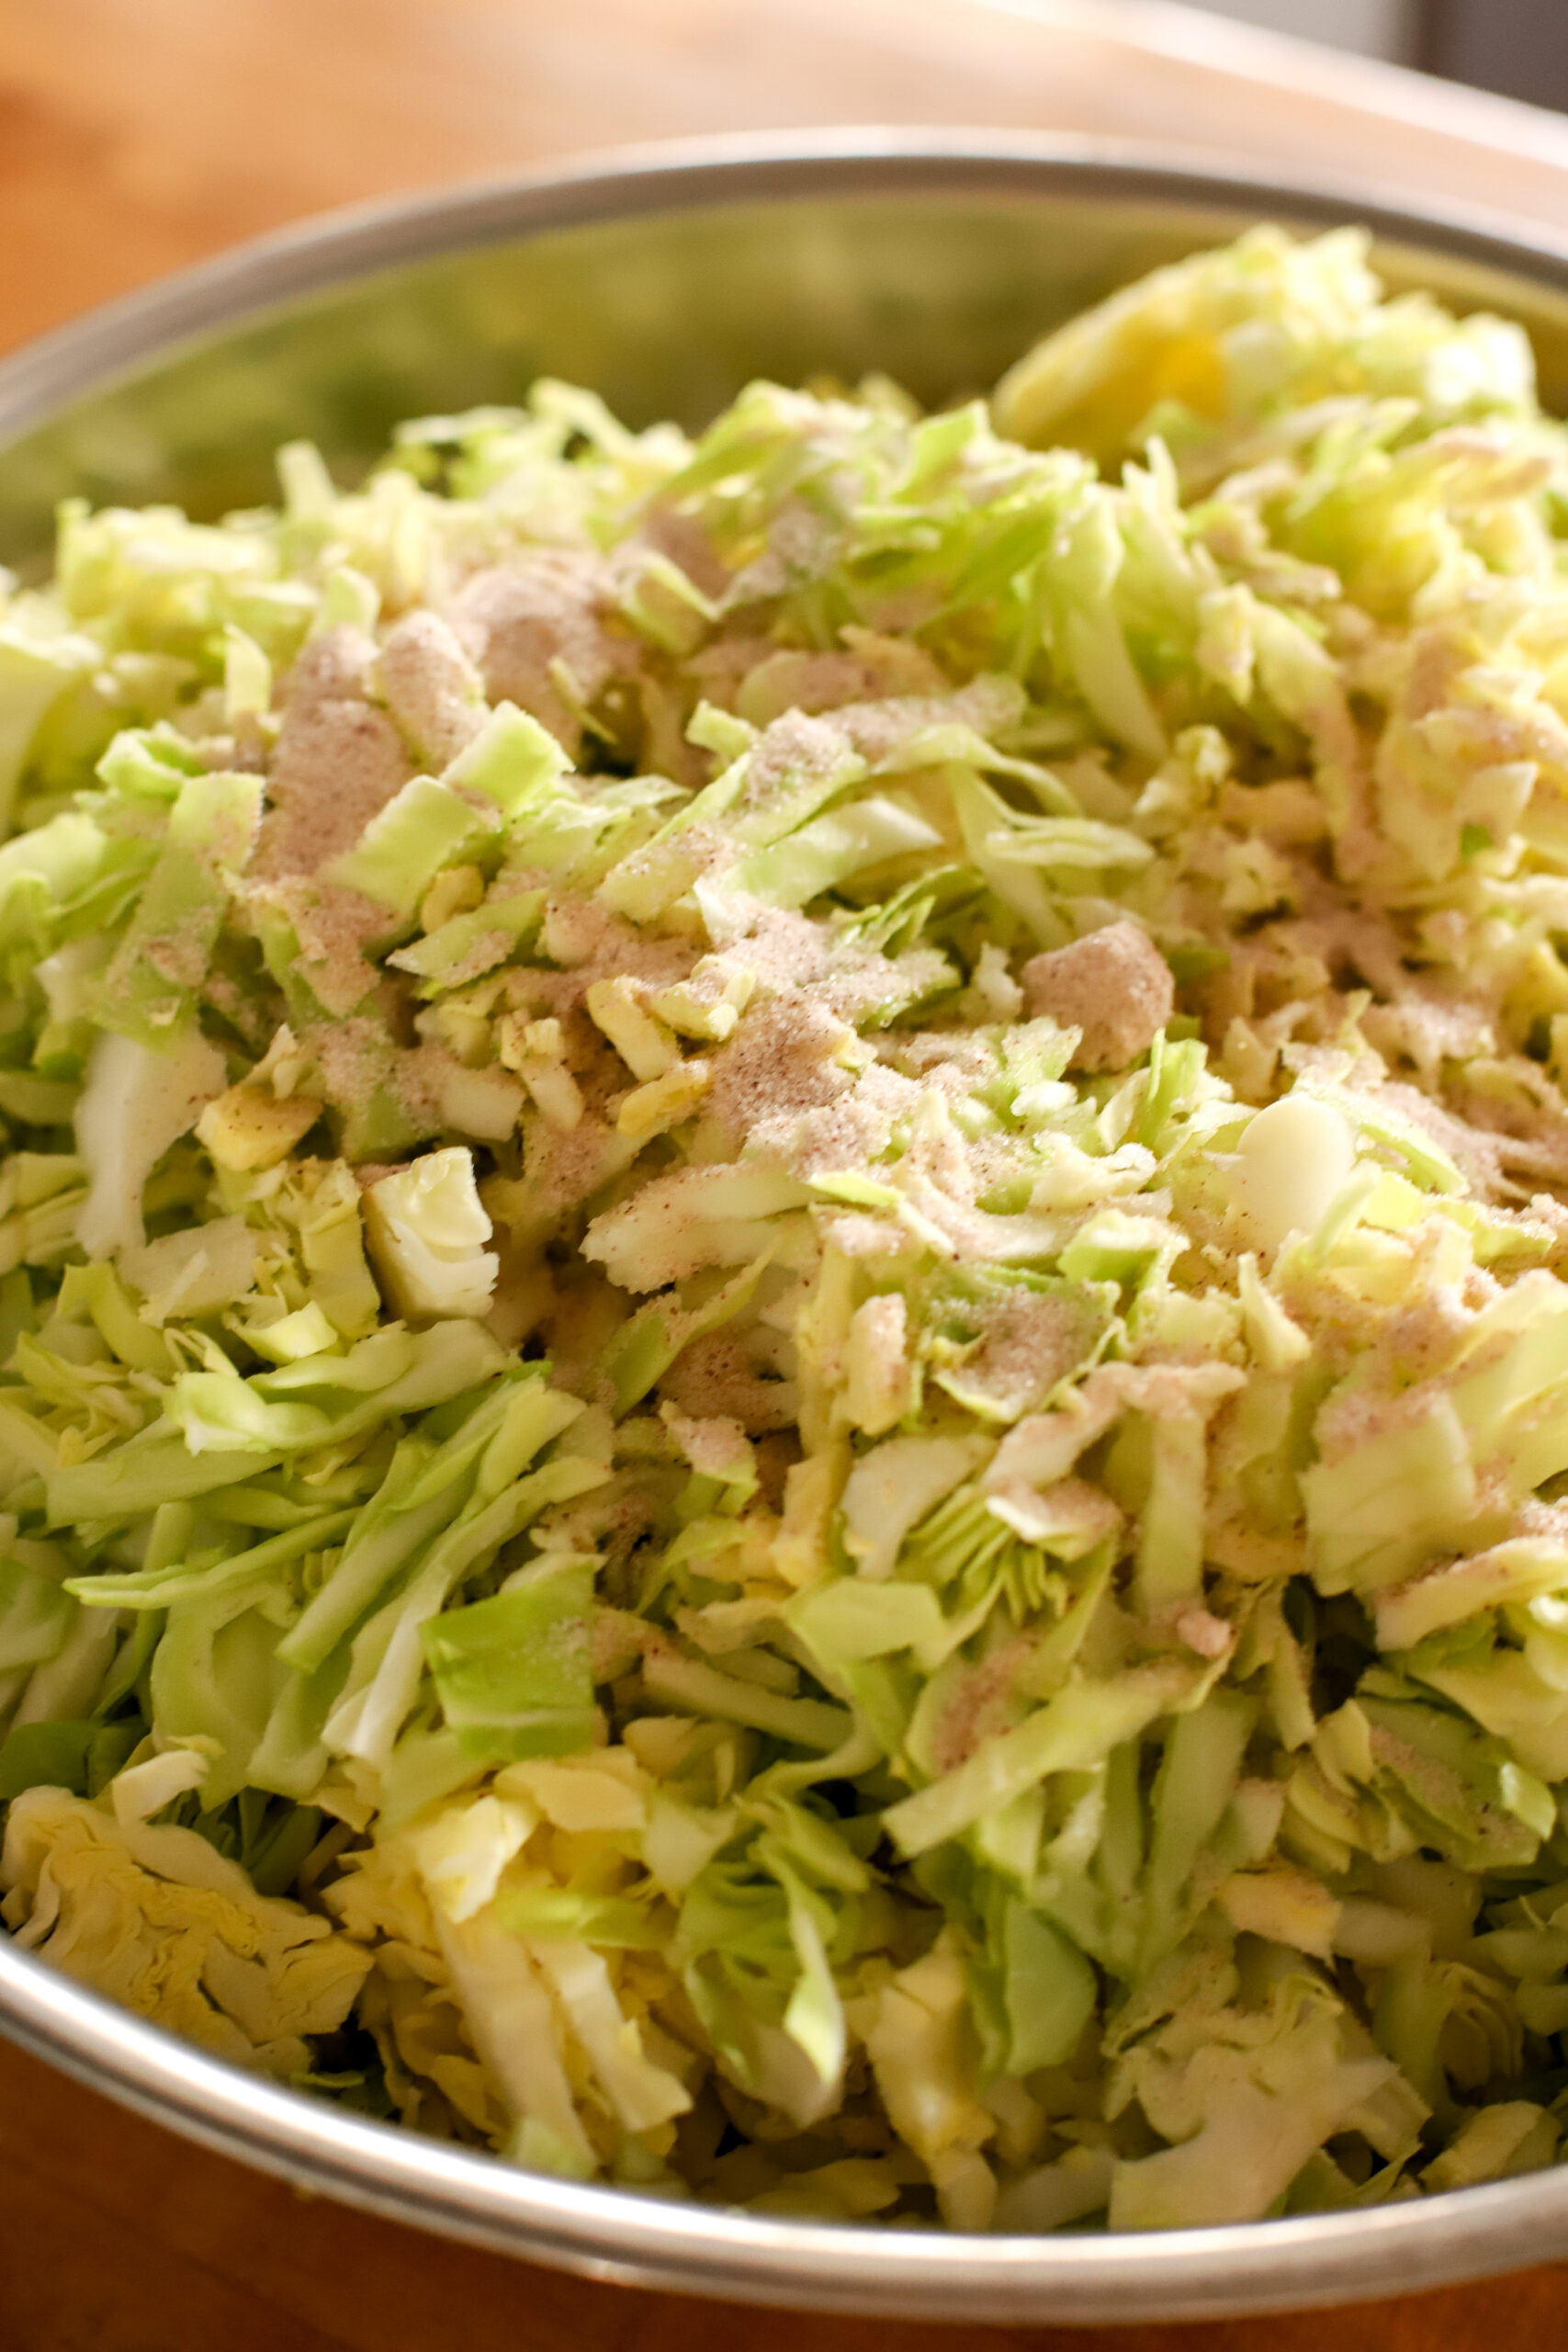
- Next, stir in the garlic, lemon juice, and optional cilantro.
- Stir ingredients until cabbage is wilted, just starting to look wet and produce juice. Cover and let sit on the counter 1 hour.
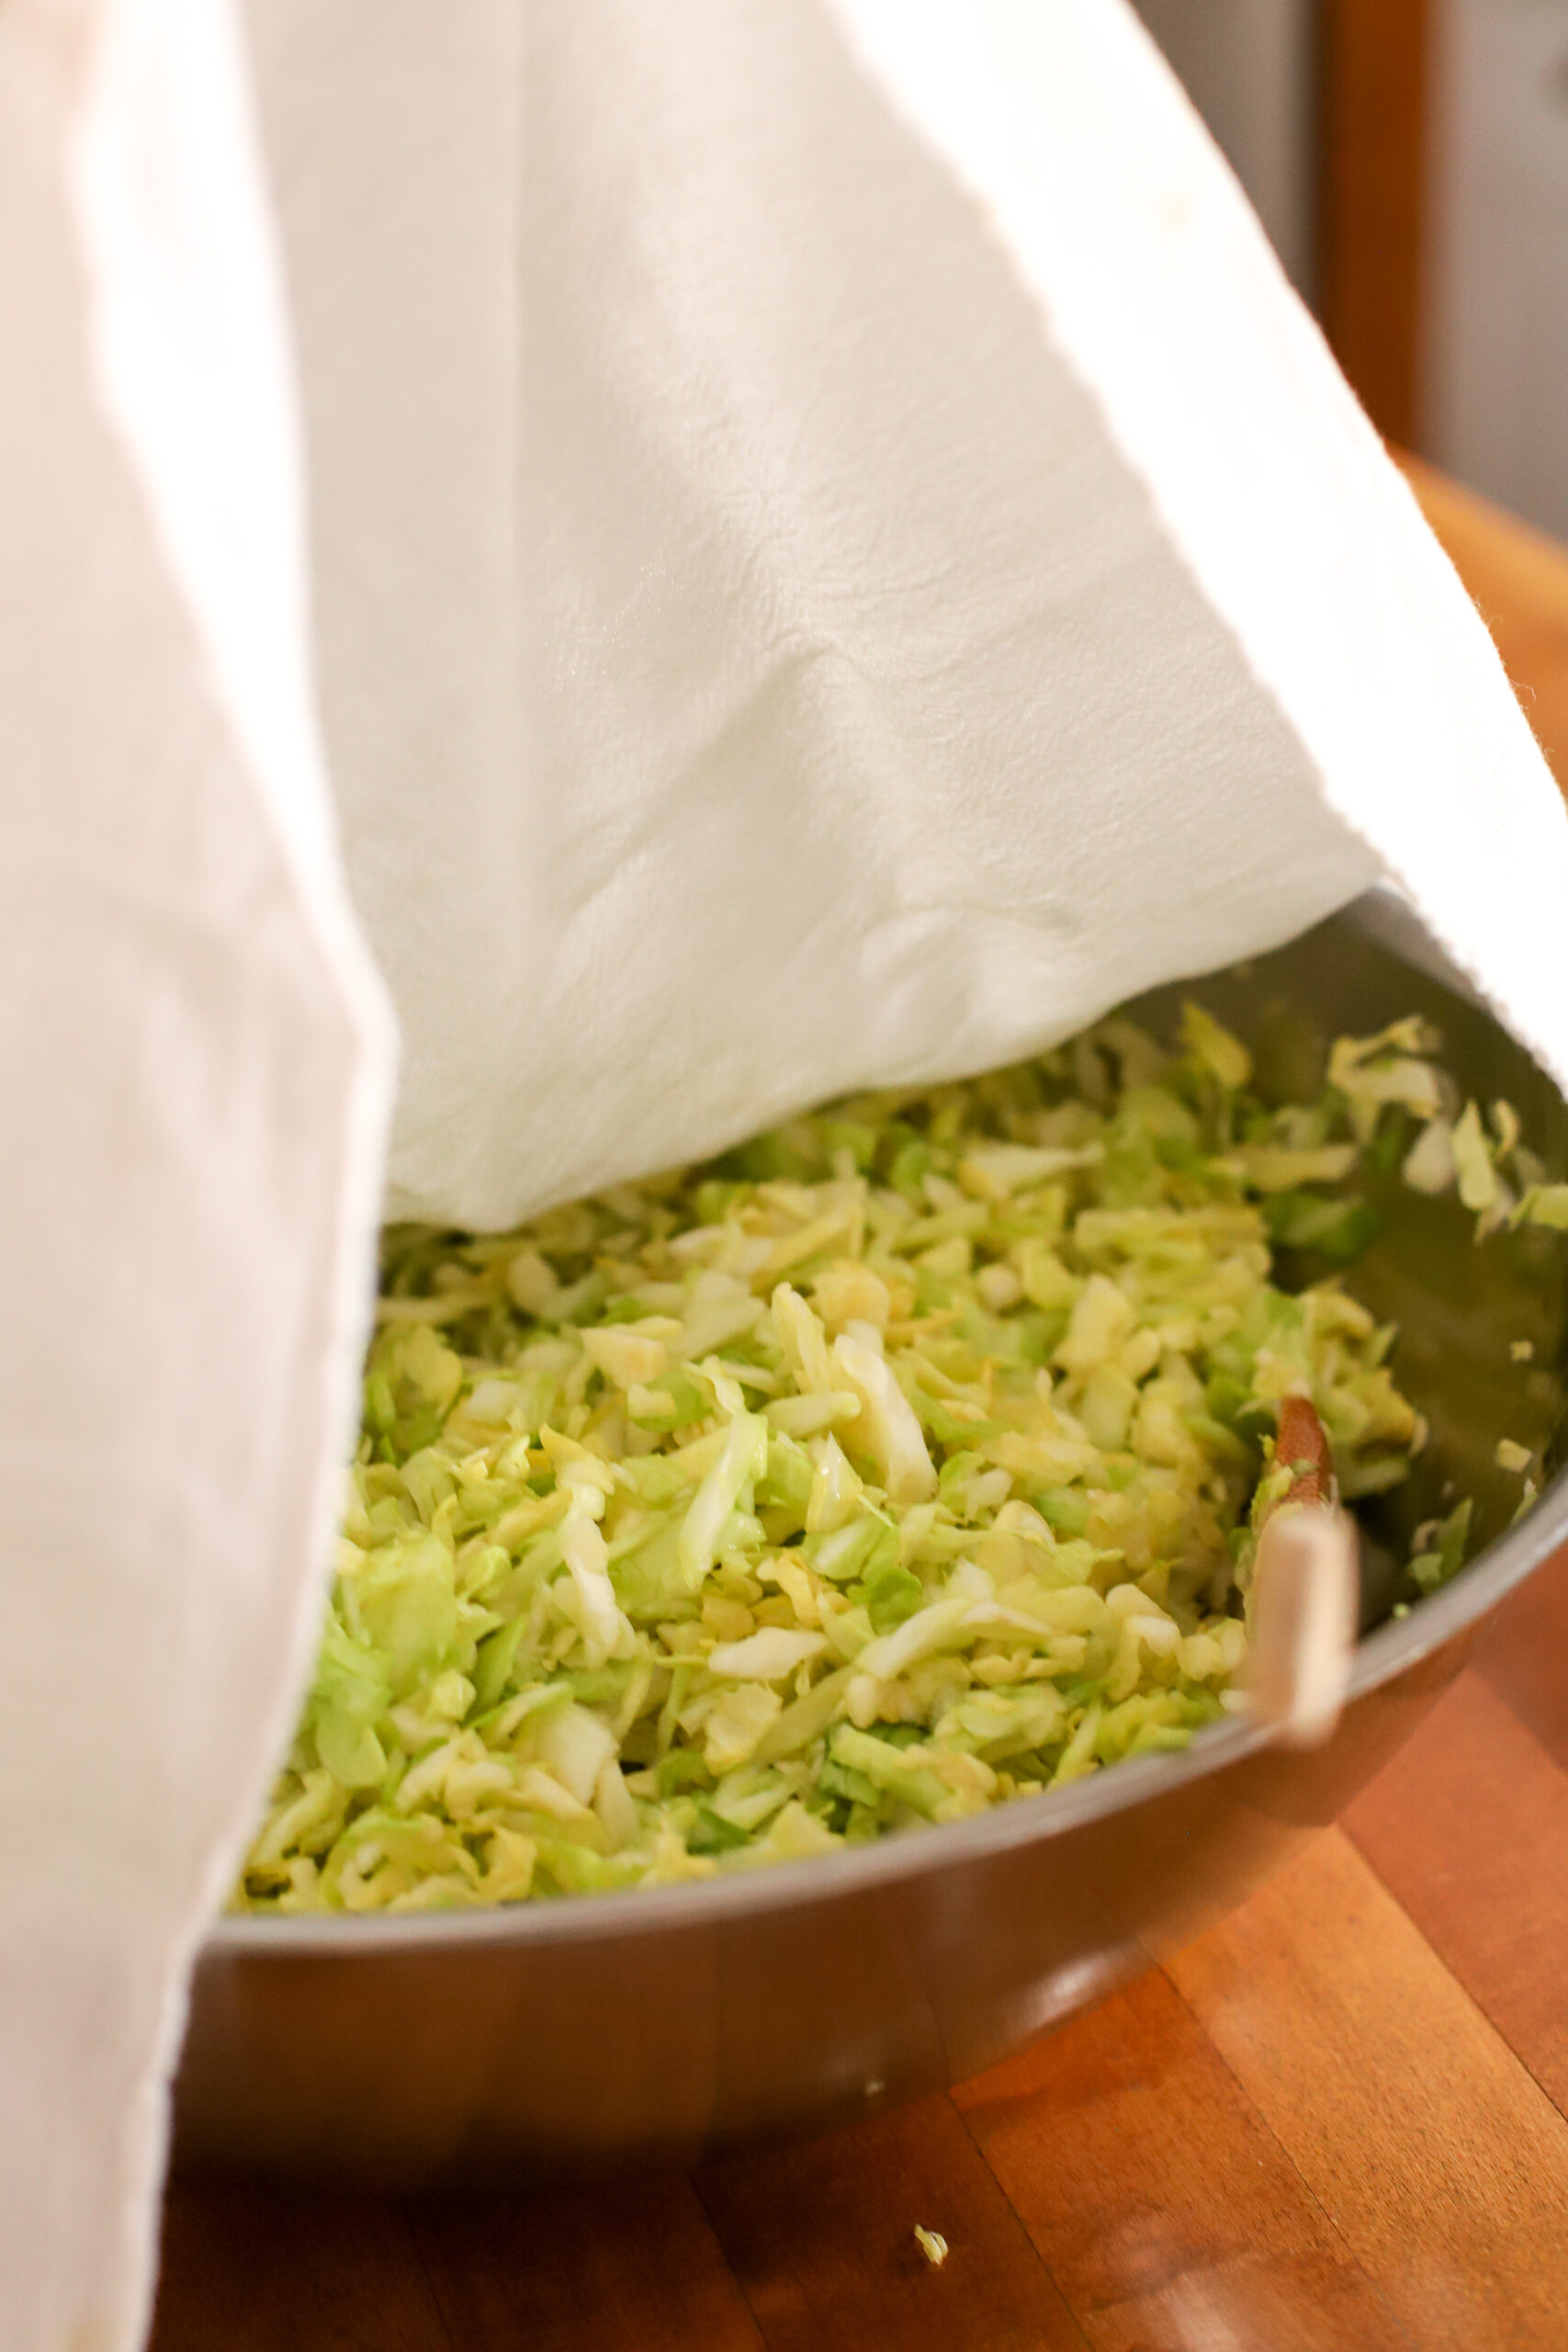
- After one hour, your cabbage mass will have decreased in size and there will be plenty of liquid in the bottom of the bowl.
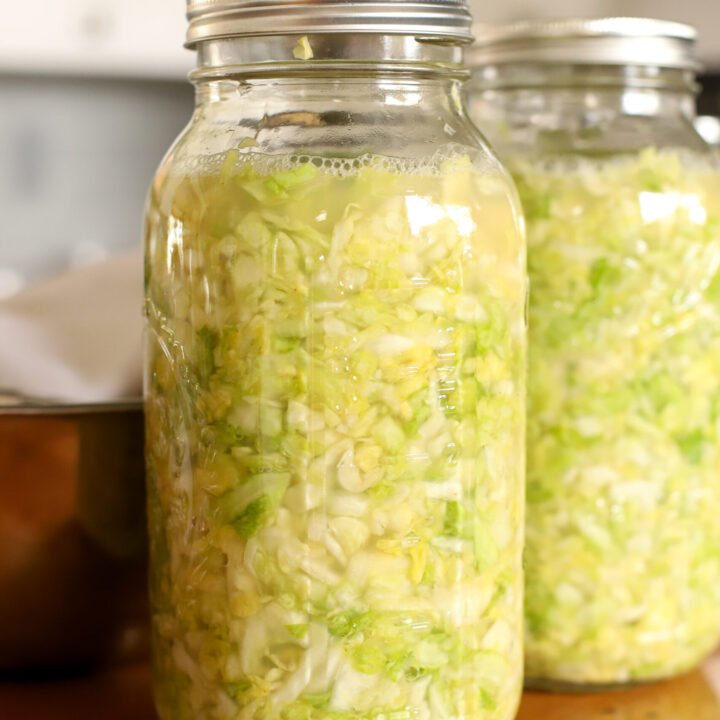
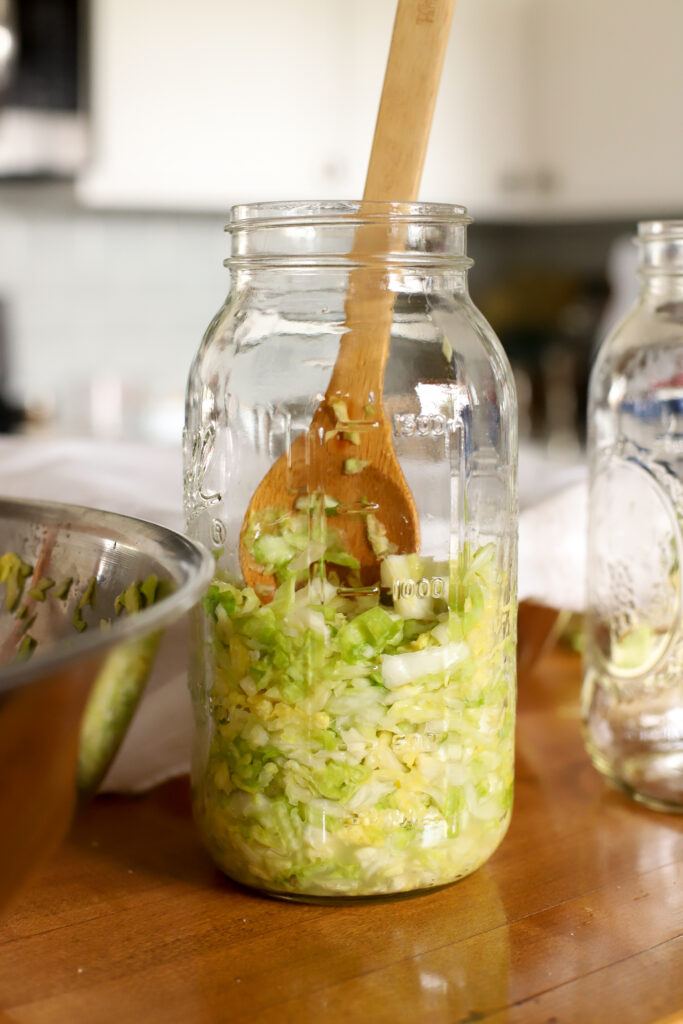
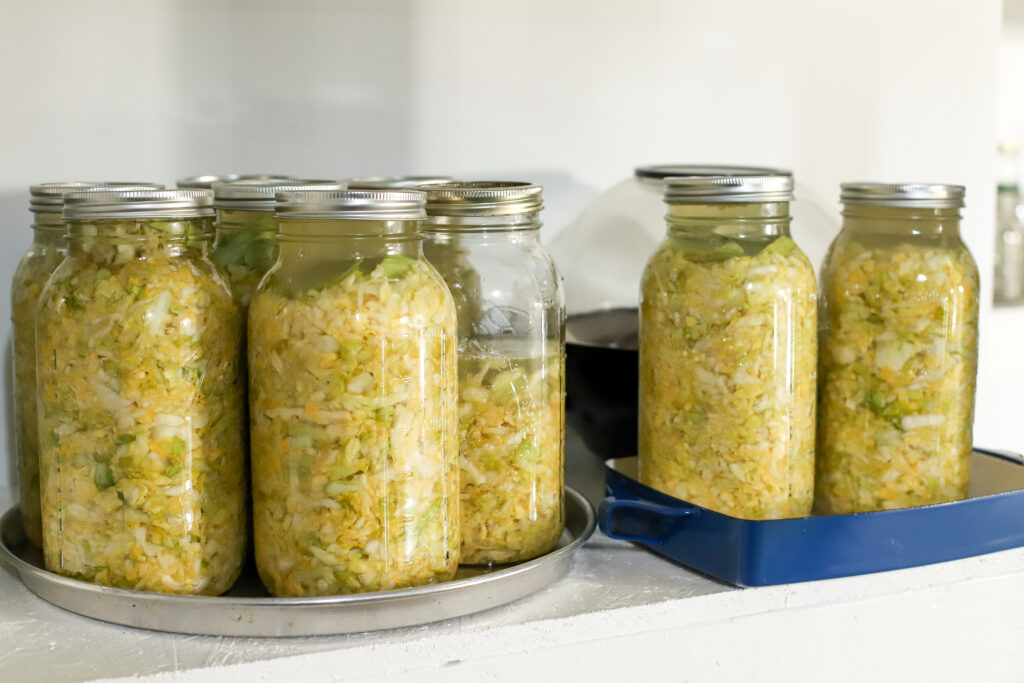
- Begin filling jars by adding cabbage to the jar and filling about a 1/3 of the way. Lightly tamp down the cabbage to remove air bubbles. We want the cabbage pressed tightly into the jar so that it stays under the juice but not compressed so firmly that the microbial actions cannot take place. Lightly tamp down the cabbage several times using a wooden spoon. You can see in the picture the tamped down cabbage in the bottom verses the cabbage I just added to the jar at the top.


- Continue following step 8 until jar is full, leaving about an 2 inches of head space at the top. You will begin to see the jar filling with juice as you press down each addition of cabbage. Once each jar has been filled there will be remaining juices at the bottom of the bowl. Evenly divide the remaining juice into each jar.
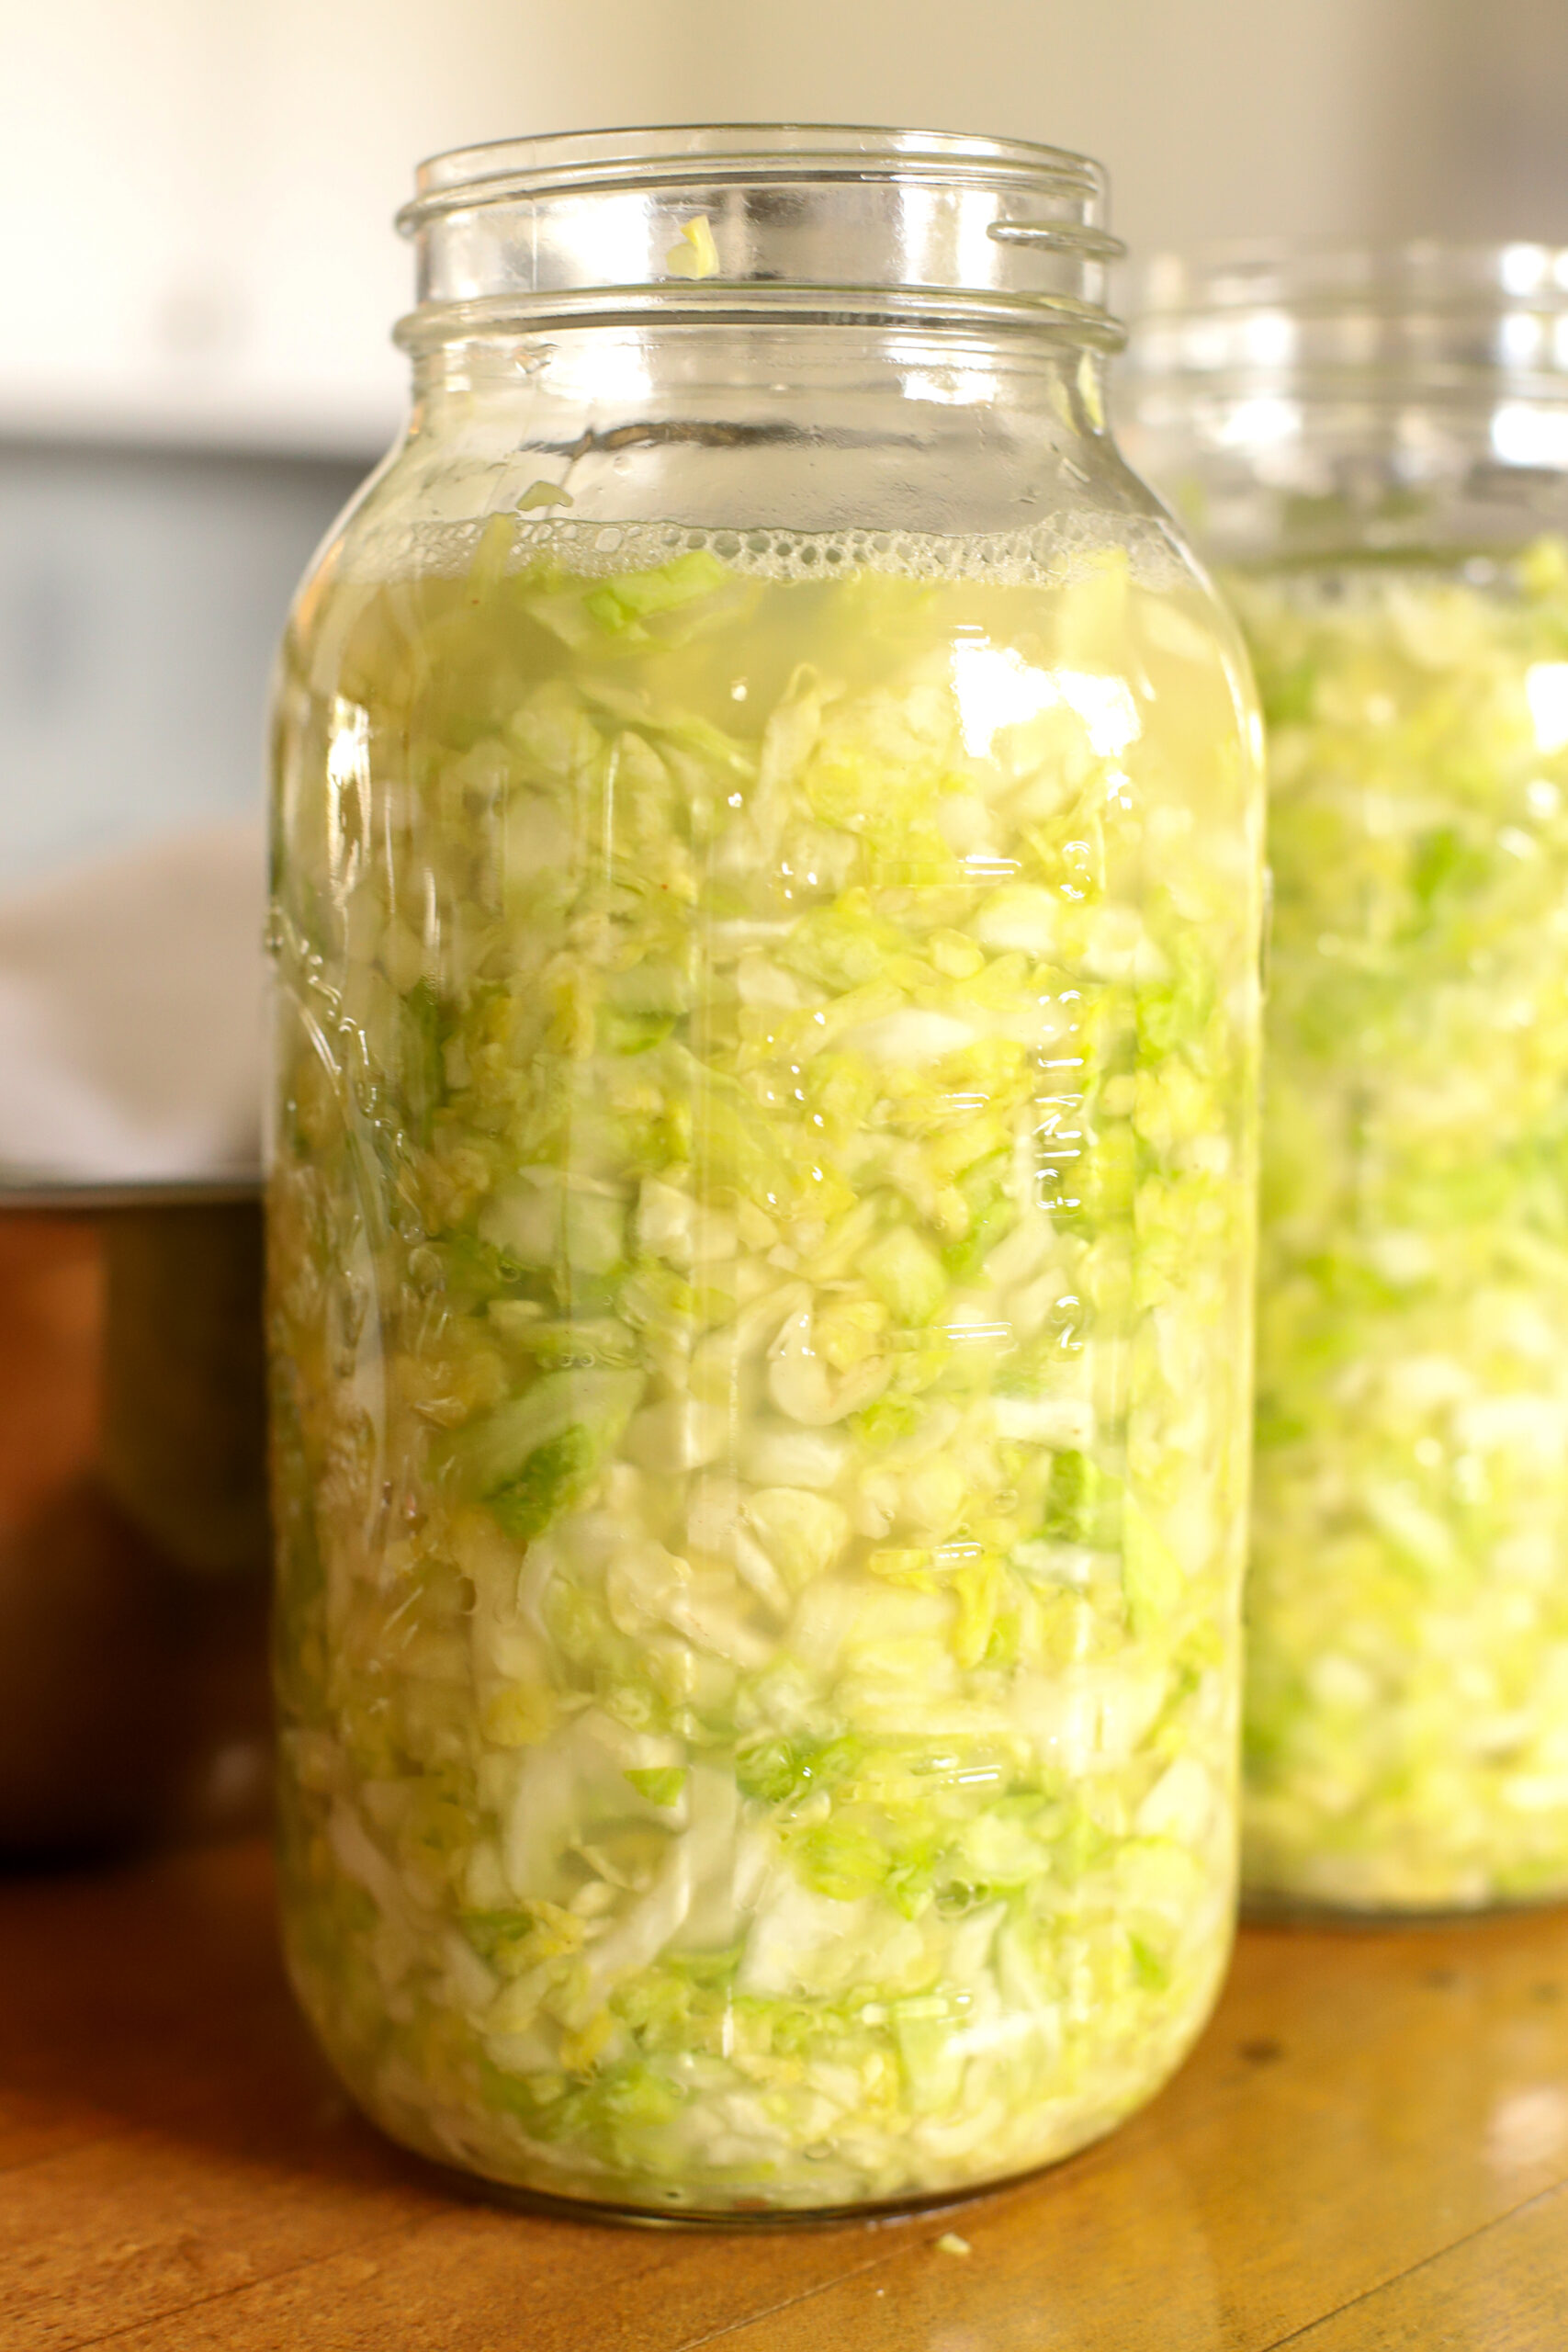
- Place a cabbage leaf over the top to cover the shredded cabbage. Place your weight over the cabbage leaf and press down until all cabbage is submerged.

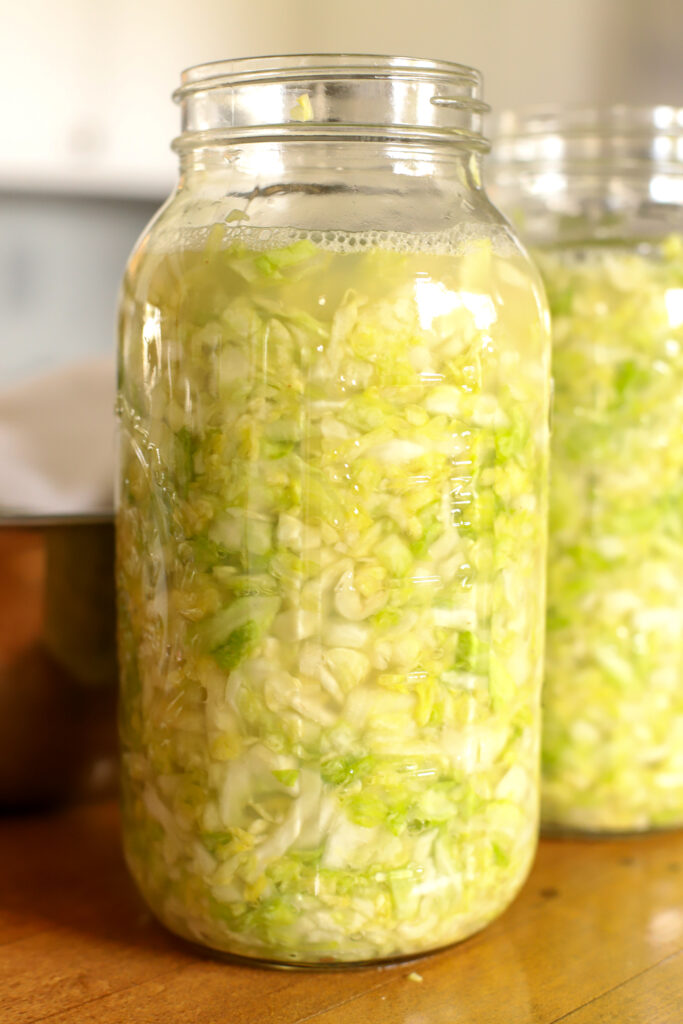
- Don't worry if your juice just barely covers the cabbage. In a few hours your jar will produce more juice and will be completely covered.
- Set jar seal and lid on tip of jar. Do not twist to seal shut. It just needs to rest on the top. This allows your jar to naturally "burp" and release gasses as the fermentation process happens.
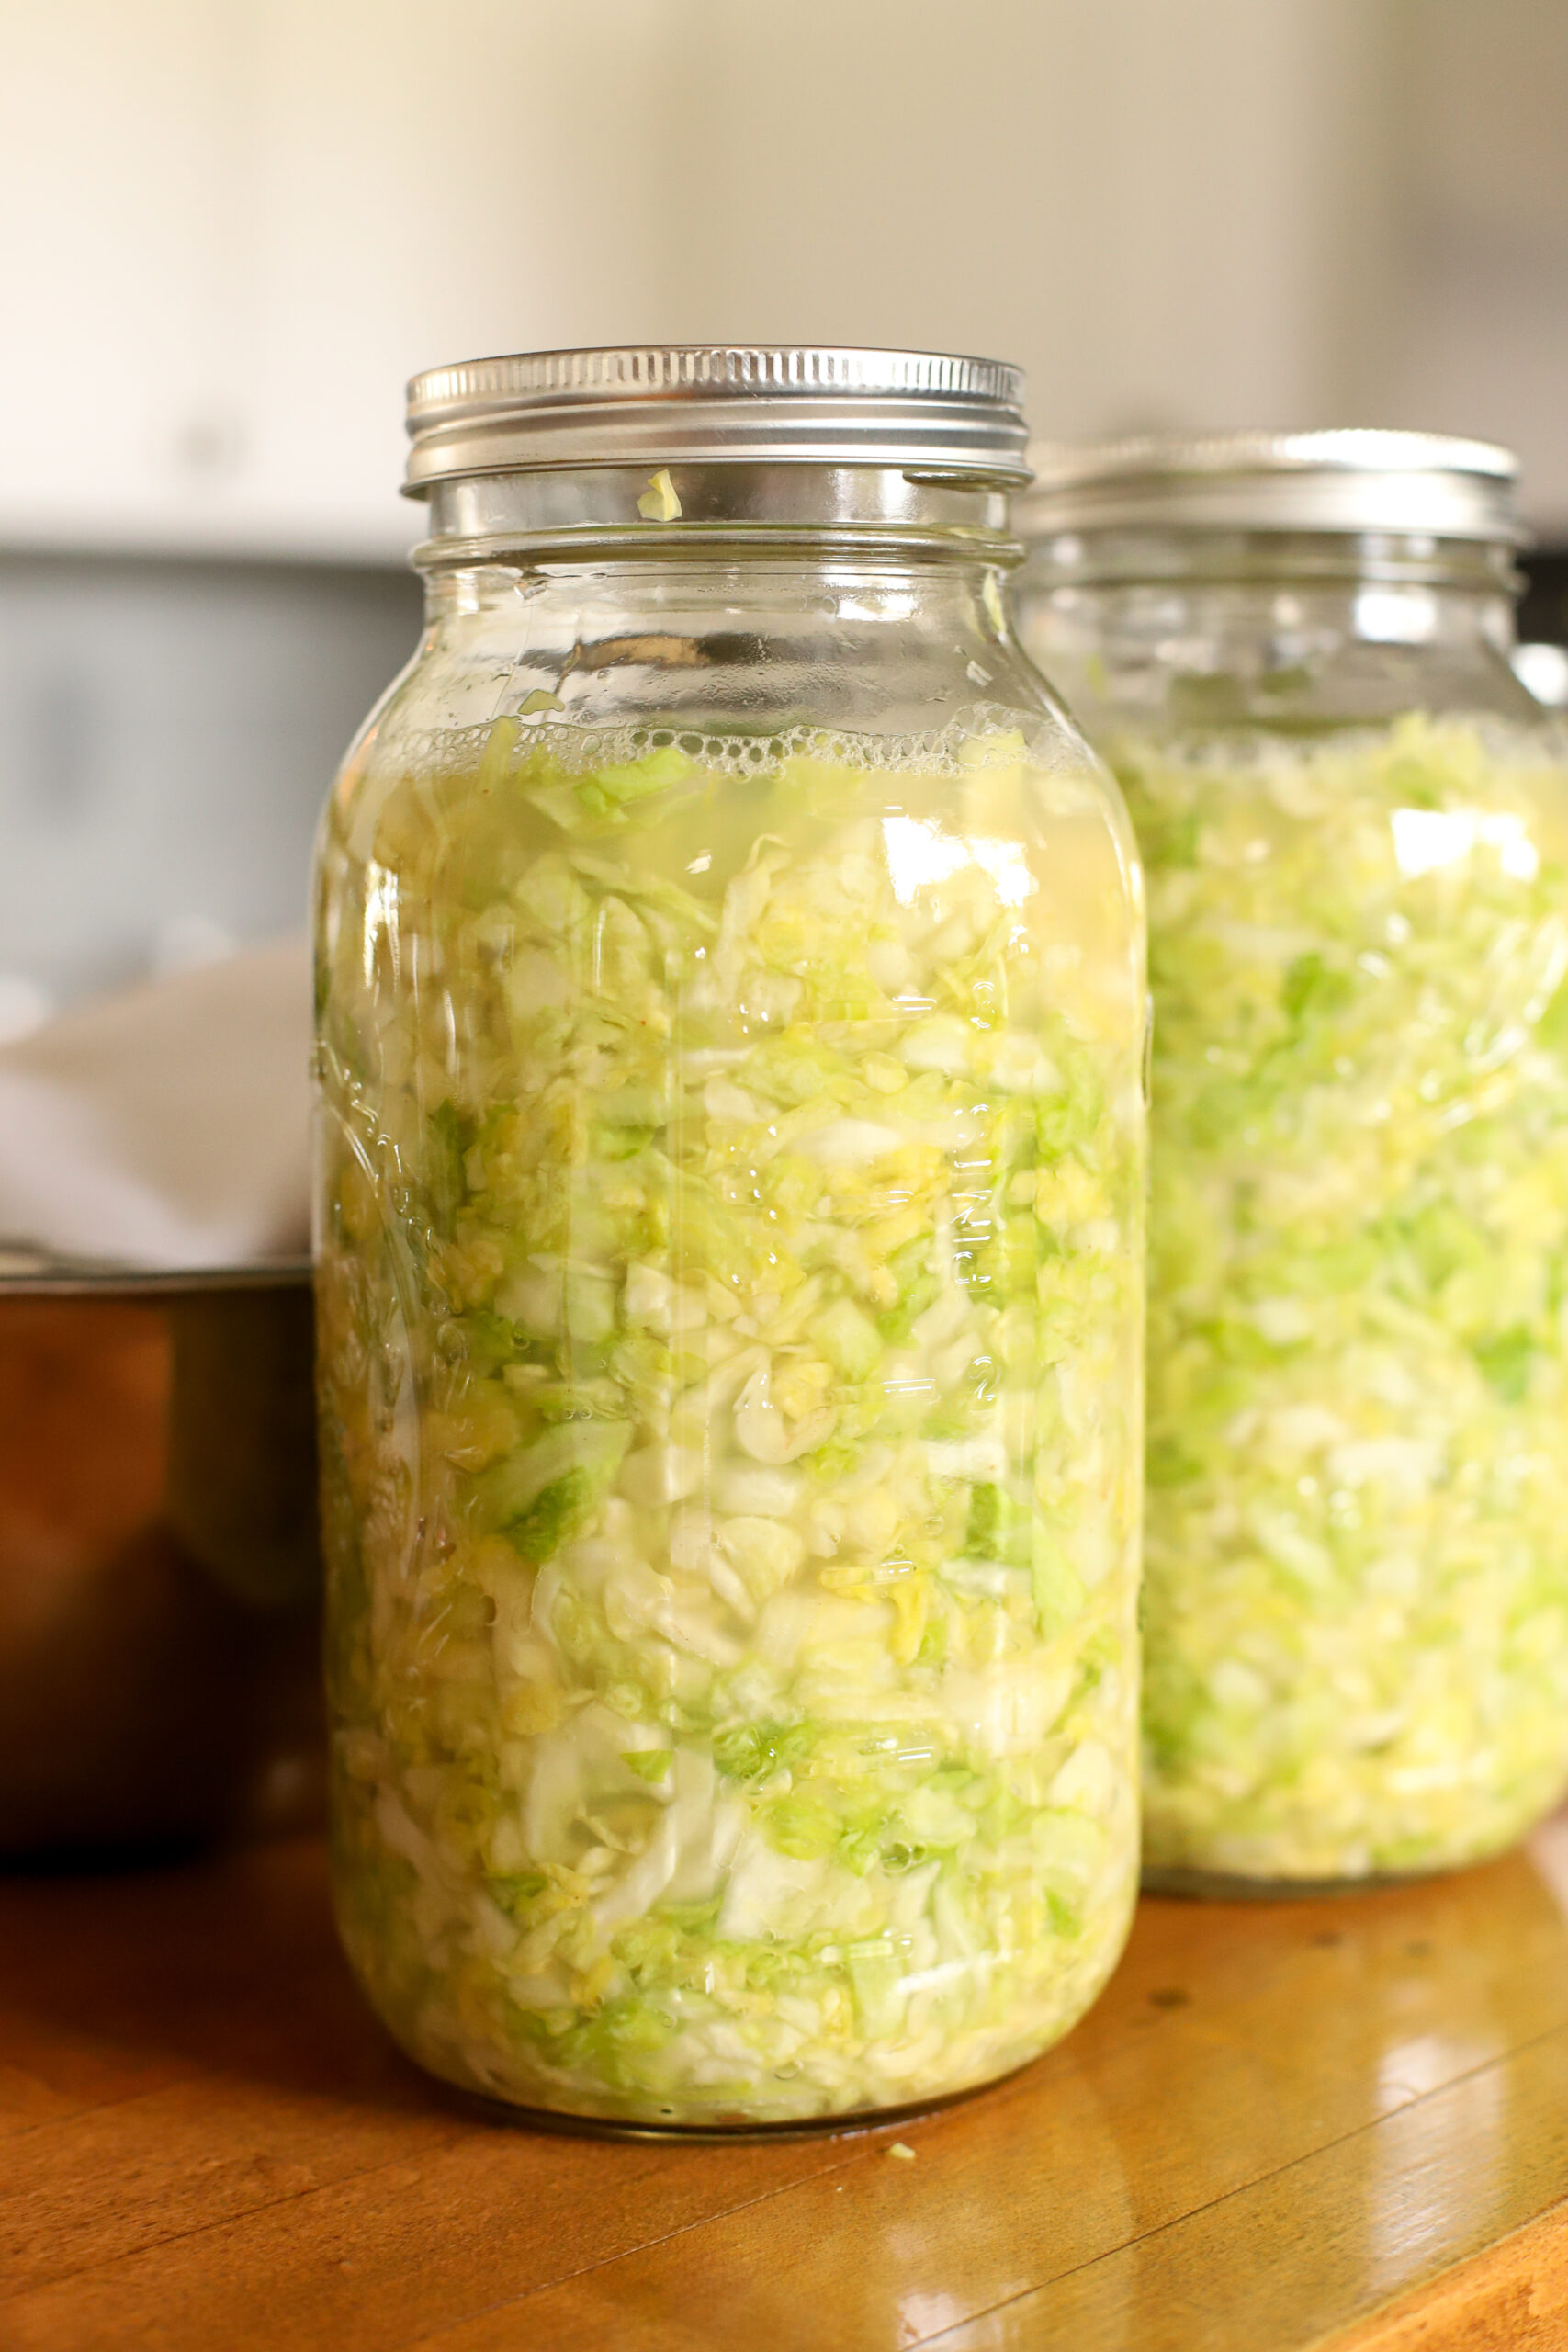
- Place jars in a deep tray as they will most likely produced so much juice they will overflow.

- Place jars in an area of your home where the temperature will be consistent. For me this is a shelf at the bottom of my basement stairs. It stays about 68-70 degrees there at all times of the year and is out of direct sunlight. It may take a few ferments to find the best place for you, just make sure it's not in the kitchen where the temperature can fluctuate when cooking. A pantry or spare room might be the perfect spot.

- Let sauerkraut ferment 7 days. Your ferment will then be bubbly and delicious! At this time you can taste the kraut and ferment it longer if you decide the flavor isn't right for you. My suggestion is to not do more than 7 days if this is your first time fermenting. Once it's refrigerated you will taste the true flavor and it is always the perfect tangy crunch for our family at this stage.
- Store finished sauerkraut in the refrigerator. I usually make large batches as I have loads of cabbage coming out of the garden. While we usually gobble it down pretty fast, this sauerkraut has stored well for me up to 6 months. You can definitely store it longer although the texture can start to change a bit as you get closer to one year. The benefits are still the same!
- Serve as an easy side for breakfast, lunch, or dinner, enjoy!
Notes
- This is such a simple skill to learn and the only way you are going to learn is by trying. If you encounter hiccups, they are just lessons you will learn for the next time. You can do this! Keep trying! It's so much fun and so worth it.
- ORGANIC INGREDIENTS: while I understand organic ingredients can be hard to find if you are not growing them yourself, it is very crucial that these ingredients be organic. The microbes at work here need the best ingredients to do their jobs well. While I don't know what could happen if non organic ingredients are used, I do know that I do not want pesticides and herbicides or their effects included in my fermenting process or end product.
- There is always a chance that your ferment could spoil during its fermentation process. The odds of this are very low. If you encounter issues, refer back to the post where I address them or feel free to message me and I would love to help!
A step by step guide on how to make homemade sauerkraut:
Maybe this is your first time ever stepping into the beautiful world of fermenting. WELCOME! I am so glad you are here. In this post I hope to SIMPLIFY the vast world of fermenting sauerkraut down to easy skills you will understand and master. Making homemade sauerkraut can seem daunting, especially in a world of bottomless information. I hope to condense all of this knowledge into actionable steps you can feel confident accomplishing and more importantly, ENJOY the benefits and flavors of fermenting cabbage in your own kitchen.
In this post we will dive into the 5 pillars of really good homemade sauerkraut:
- The beautiful world of microbes
- Sourcing high quality organic cabbage
- How to make homemade sauerkraut
- How to add flavors the family will love
- Tips and troublshooting
Why do I love fermenting?
I cannot remember the first time I started fermenting. However, I think it was around the time my mom did some reading on the benefits of it. It was my job to figure out how the process worked and I know I tried everything from sauerkraut, to kefir, to celery, to carrots, to garlic, to cucumbers! Most of my ferments turned out soggy, moldy, or with wonky flavors. It wasn’t enjoyable. The fermentation world is vast but I had little success with actually loving how my ferments turned out UNTIL I realized the beauty of how a ferment works and the simple processes to make it fool proof. It took time to learn. I’m confident that with time under your belt you will learn these simple skills as well!

Join us for coffee on the porch!
Join us on the porch for our Substack newsletter and get our newest recipes straight to your inbox. This is a biweekly email for women, wives, and mothers who desire to cultivate homemaking skills, nurture healthy families through homegrown and homemade food, and grow in grace & godliness in the places God has us.
The wonder of microbes…
Microbial life is literally everywhere. In a single teaspoon of healthy soil there can contain more microbes than people on the earth. WHOA! In dirt, these microbes communicate with plants to get the plants what they need. One microbe can travel several feet from the plant to get the plant the nutrients that it needs.
The same signal system happens in our own guts. Scientists do not fully understand all of these processes yet however they have discovered that microbes in the gut not only break down food so that the body can utilize it but they also create B and K vitamins that can be easily absorbed by the body. And we haven’t even begun to talk about the role microbes play in our mouths, skin, ears, noses…the list goes on!!
Microbes have specific, unique, and necessary functions on and in literally every living thing. Without them, the world would be sick, in pain, unable to function, and dead.
We can already see the affects of losing microbes in our soil through chemicals and loss of organic matter and we can see the affects in our own bodies caused by medication and antibiotics. Everywhere you look- soil, animals, and people are all being affected by the loss of these beautiful God created organisms in our lives.
So what can we do to steward this amazing microbial life and replace these necessary helpers that have been lost? One of the easiest first steps, that’s also delicious, is through making your own homemade sauerkraut!
Homemade Sauerkraut under the microscope…
Sauerkraut is made possible through a process called lactic acid fermentation. During this process, microbes found on the surface of the cabbage (most often Lactobacillus) convert the sugar of the cabbage into lactic acid as it sits in a high salt and oxygen free environment. This lactic acid gives sauerkraut its distinctive sour taste.
The benefits for us from this process are amazing! Utilizing the fermentation process not only increases the flavor of the vegetables but also increases the body’s ability to absorb the nutrients found in the vegetables. Let the microbes do the hard work for you.
Sourcing high quality organic cabbage- it’s easier than you think!
I’m sure by now you will realize the importance of how food is grown. While I would LOVE if everyone had a backyard full of garden goodness, I realize that there are certain situations and seasons where this is not possible.
My first recommendation when sourcing organic cabbage is to grow it yourself. It’s so easy! It’s one of the first plants you put in the ground in the spring. Insect netting makes keeping pesty bugs away a cinch. And by June/July you will have beautiful cabbages grown right in your (hopefully) microbial rich soil.
My second recommendation would be store bought organic cabbage. Due to the heavy use of pesticides on cabbages, not to mention the completely lifeless soil they are grown in, it is important to me to buy organic. It’s not the best but it is better. How do I find organic cabbage, you may ask? Here’s two easy options!
- Call your local grocery store and buy in bulk! Our local store sold us a 40lb box of organic cabbages for a great price. We were able to ferment some and cook with the rest. They store incredibly well in the fridge.
- Shop through Azure Standard if you have a drop off location close to you. Unfortunately, we do have a drop location close so this wasn’t the best option for us.
- Grocery store or farmers market. Some grocery stores stock organic produce so you might get lucky. It’s hit or miss at our local store. Farmers markets would be another great option!
How To Make Homemade Sauerkraut- anyone can do it!
It’s true, anyone can make sauerkraut. I know you may find yourself intimidated by the steps. Maybe you think it’s strange to leave unrefrigerated food on the counter for days. And maybe you just can’t get over how you ruined fermented food in the past.
Well I’m here to bring your confidence back! Don’t overcomplicate it. You are simply bringing ingredients together in a specific way to allow the microbes to do the job they were meant to do. Do your part and they will do theirs. It’s a beautiful team effort that will lead to delicious results!
Remember, generations before us have been making sauerkraut with far less gadgets and gizmos to help aid them than we have now. In fact, I know of someone who weighed down their cabbage with a rock and another family who “peeled back the mold” to scoop cabbage out of a crock in the root cellar. While we have more refined and specific instructions now, this is a natural and God given process that literally anyone can do.

Step-by-Step Instructions
How to make homemade sauerkraut taste good to even the pickiest eater:
While sauerkraut on its own is so delicious, I realize there are some who may not appreciate the tanginess and sourness of it. Fermented food has a flavor all on its own that can be new and strange to some and may turn off others.
This is why I always add garlic and lemon juice to my sauerkraut. It’s the perfect additional flavor that everyone will love. Sometimes I will even add cilantro to this mixture especially if I have a lot growing in the garden.
In fact, it’s how I got my dad and brother to love it! They eat it so fast I can hardly keep up a stash. We enjoy it as a side dish for breakfast, lunch, or dinner. The guys love it on their brats but they especially love it on enchiladas! It’s almost like a Mexican slaw on top. Yum!
Tips and troubleshooting…
Use half gallon jars
One of the biggest pieces of advice I can offer you when making sauerkraut is to make it in half gallon jars. Fermentation vessel size matters. This changed everything for me. I used to make small batches in quart mason jars. It was a struggle to get all the ratios of ingredients right and it often fermented too fast. It may seem like a large batch to use 1/2 gallon mason jars, but it is so worth it in the end. If you end up hating the sauerkraut you can always feed it to your chickens, you’ll only be out a few dollars and a bit of time!
Invest in a large bowl
While this is totally unnecessary, it just makes the whole process smoother. A large metal bowl can be used in a lot of different ways and is just nice to have on hand when you do a lot of your own cooking. Yes, it’s metal. Some have questioned whether using a metal bowl is bad when fermenting. The answer- we aren’t fermenting in it, we are fermenting in the jars. The metal bowl is only used during a short period when the cabbage is salted to produce juices. Anyways, the bowl is just plain handy.
Salt is important
Choosing the right salt is key for any good ferment. We want unrefined and non-iodized for a really great ferment. I choose to use Redmond’s Real Salt and I have had many successful ferments with it. It also has great flavor. It has been my experience in the past that when utilizing other salts it could change the flavor of the final ferment. Use the salt you have and if it doesn’t work or the flavor could be better, consider changing it to a better salt than you used before. Good minerals=happy microbes!
What about mold?
Mold rarely happens and if it does it is truly no big deal as long as the mold is only present at the very top. You will be fermenting this cabbage for only seven days therefore it should not be an issue. If you do see mold it is most likely caused by the cabbage not being submerged under the liquid. As long as the mold is only on the surface, simply scoop out the mold and throw it out. If the mold permeates the whole jar, you may want to make a judgement call and throw it away. Think of it like a bad apple. Sometimes you can cut out the mushy or wormy parts of the apple and use the rest, other times the apple is too far gone. It’s as simple as that.
Do I need an airlock or a pickle pipe to ferment my homemade sauerkraut with?
No, there is no need to purchase airlocks or pickle pipes to make sauerkraut. In the beginning of my fermenting journey I purchased a fermentation kit. Over time, as I experimented and researched, I realized that people have been fermenting vegetables for thousands of years Man made products were not available to assist them. They simply had a large pot or bowl, salt, water to cover their ingredients, and a large weight to keep it submerged. From experience they knew they needed to have the right environment and they would be able to produced high quality ferments without gadgets and gizmos.
Simply place the lid and ring of the mason jar on top of the jar without screwing it on. This keeps the ferment covered yet also allows it to burb itself as the gasses build in the ferment. Believe me, it knows what to do. This is why I suggest placing a baking pan under the jars. At the end of seven days you will see liquid that has overflowed as it has burped itself.
In the long run, this will save you money on unnecessary supplies and will allow you to freely ferment as many jars as you would like without being restrained to only as many jars as you have airlocks for.
I hope this simplifies your fermenting.
Happy fermenting!
I hope this guide gave you the tools you needed to grow your knowledge and build the skills needed to have a successful batch of sauerkraut!
Want to try fermenting something else? Try our Crisp Fermented Cucumber Dill Pickles.


Hello Donna! Yes, it is a glass fermentation weight. I’m sorry I didn’t specify that in the post. Glass weights are my favorite style of weights to use. You can find many different styles online. The weight keeps all the sauerkraut submerged under the liquid. This is very important for the ferment process and should be left on the entire time. After fermenting, I do remove the weight if we will be eating it right away. Otherwise, it’s a good idea to leave it in the jar so everything stays submerged. If not kept under the liquid it could begin growing mold. Thank you for your kind words, I know your sauerkraut will turn out delicious!! Let us know how it goes and if you have any other questions! -Megan and Amanda (Heritage Home Farmstead)
Can you water bath can this sauerkraut after fermentation?
Hello Robyn! We have not canned our sauerkraut but I did a little research for you and this article https://creativecanning.com/canning-sauerkraut/ has lots of good information about canning sauerkraut that you might find helpful. It is important to note that canning the sauerkraut will kill the active cultures in the kraut. We have found that the sauerkraut stores very well refrigerated for 6 months or more. We are currently eating sauerkraut that we fermented back in August and it is still crisp and delicious! Hope this helps you with your question. -Megan and Amanda (Heritage Home Farmstead)