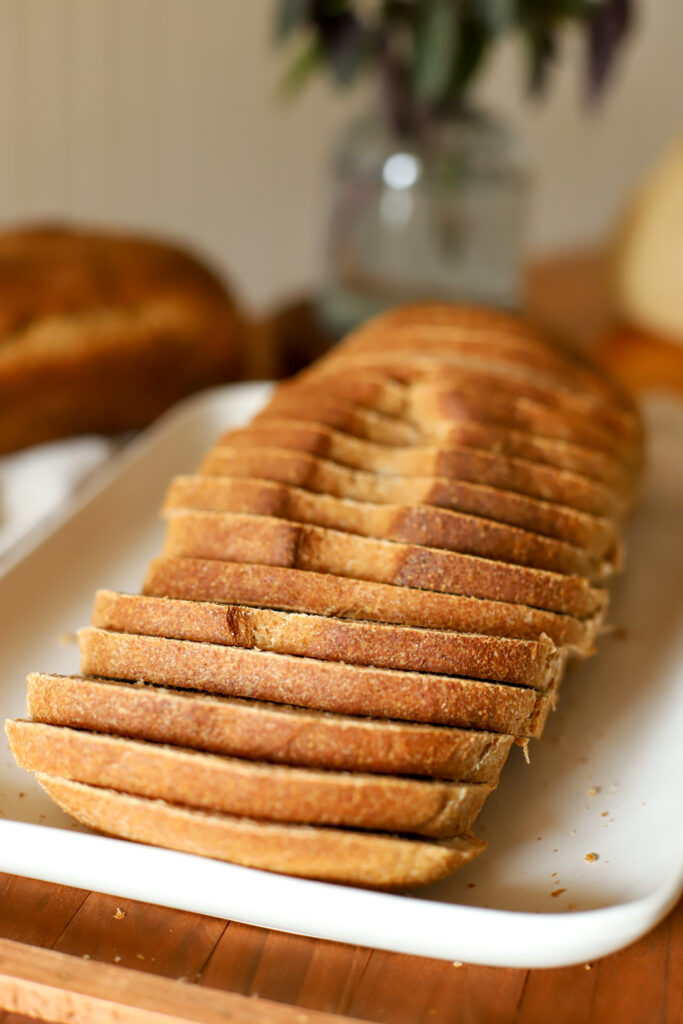
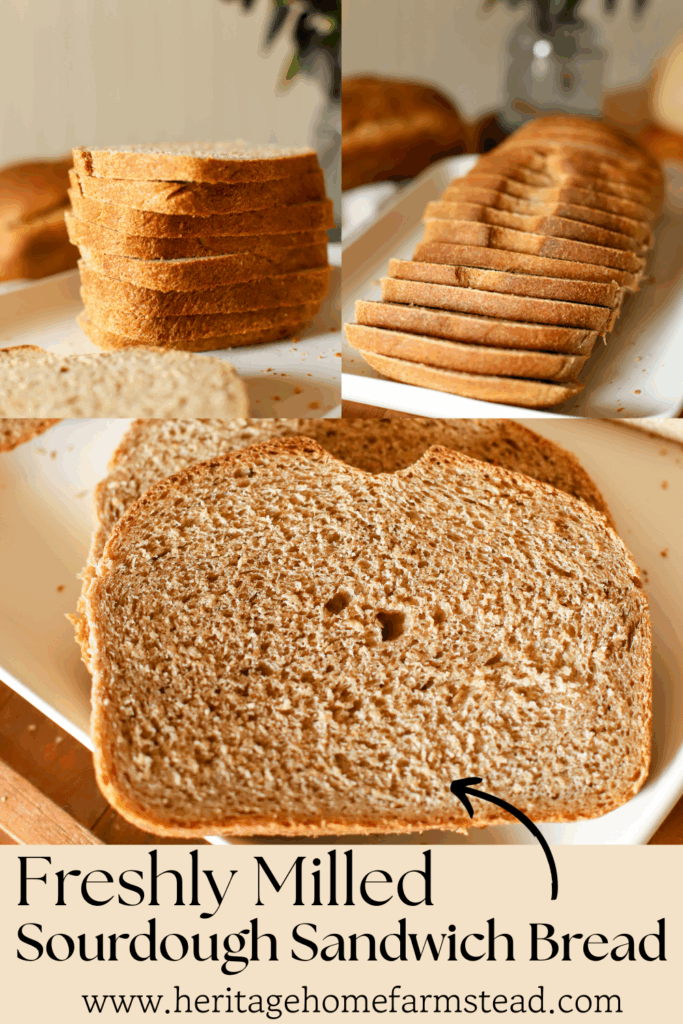
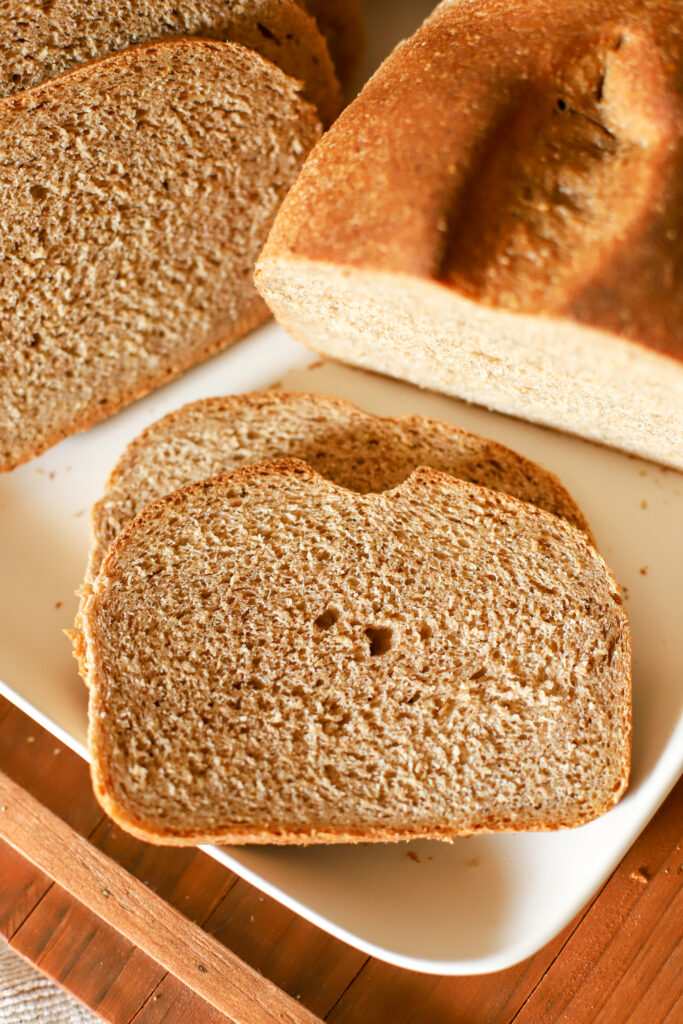
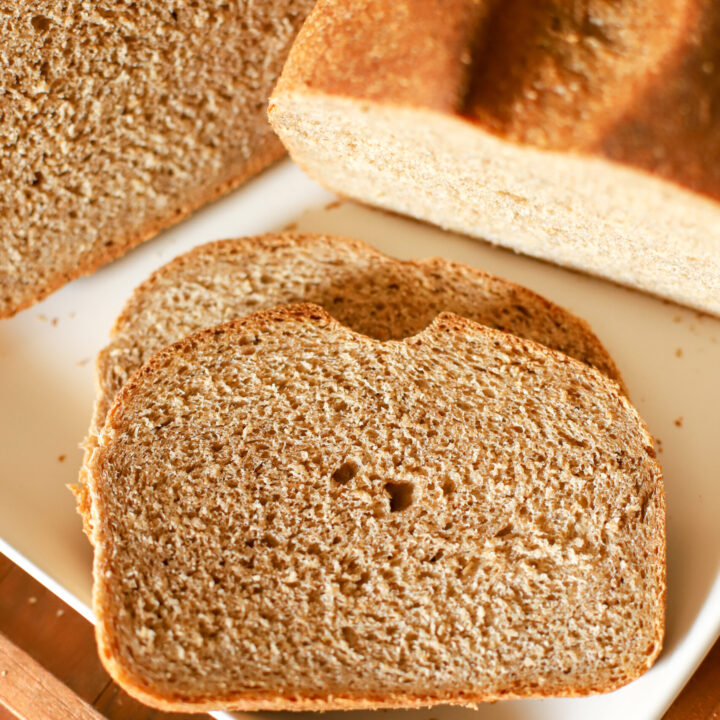
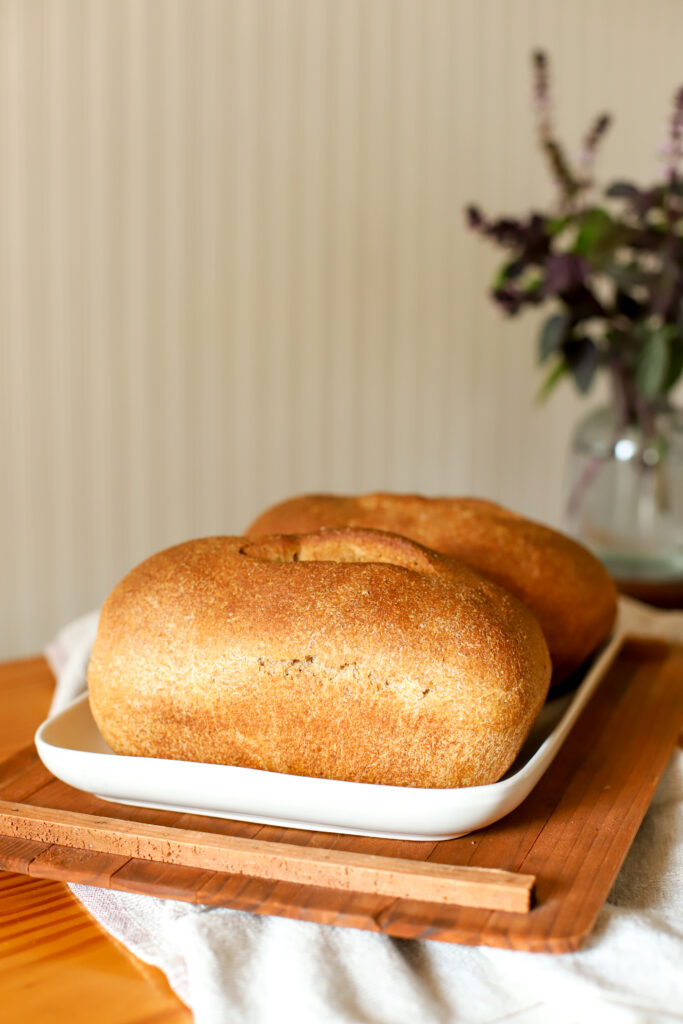
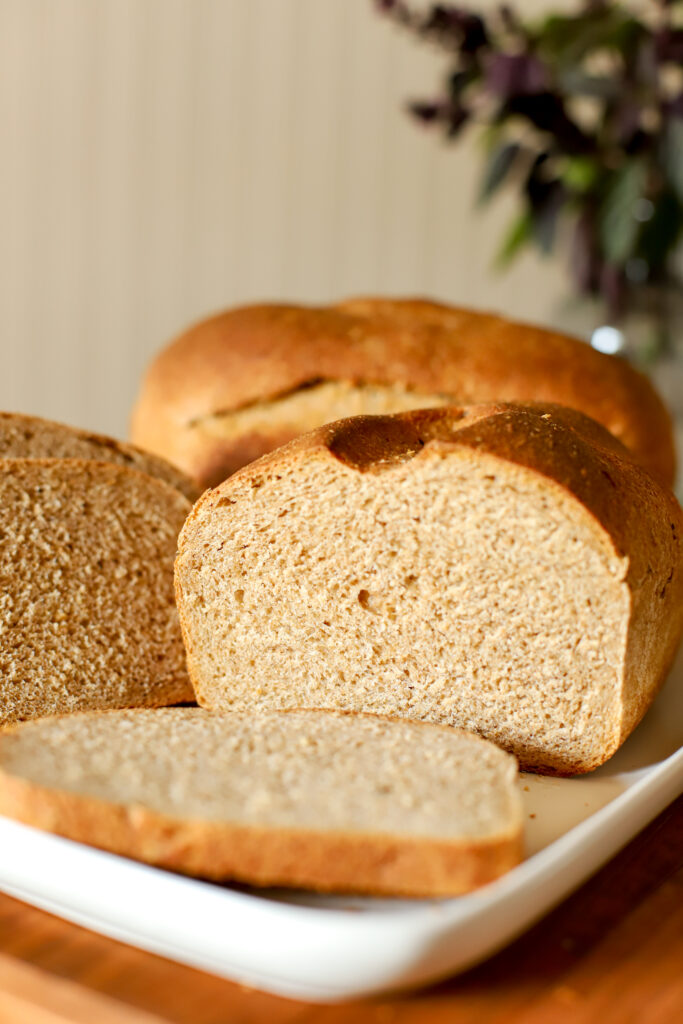
Freshly Milled Sourdough Sandwich Bread
Our no fuss sourdough sandwich bread uses 100% freshly milled flour and produces a dreamy, rustic honey wheat loaf that is perfect for morning toast smothered in jam or used with your favorite sandwich toppings.
If you’re new to fresh milled sourdough, consider trying our Simple & Soft Fresh Milled Sourdough Sandwich Bread here. It requires a few less ingredients and a simplified bulk rise and bake time.
Freshly Milled Sourdough Sandwich Bread
Our no fuss sourdough sandwich bread uses 100% freshly milled flour and produces a dreamy, rustic honey wheat loaf that is perfect for morning toast smothered in jam or paired with your favorite sandwich toppings.
Ingredients
- 1000 grams Freshly Milled Hard Wheat (Mill 2 2/3 cups hard wheat berries)
- 18 grams Salt
- 120 grams Butter (1/2 Cup), softened
- 50 grams Honey
- 100 grams active & bubbly Sourdough Starter
- 540 grams warm water
Instructions
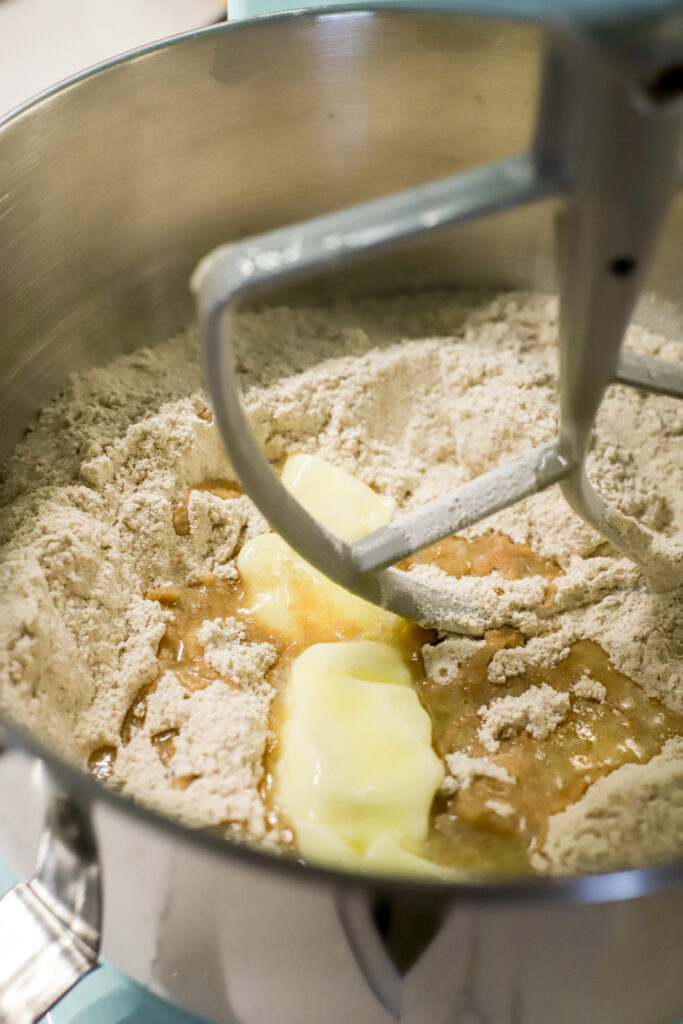
- Begin by milling 2 2/3 Cup of grains. In the bowl of a stand mixer weigh out 1000 grams freshly milled flour. You should only have a little left over. This will be perfect to dust your bowl with later on when letting dough rise. Weigh out 18 grams salt.
- Soften butter and add to flour/salt mixture. Cut in butter using beater attachment.
- In another bowl, weigh out 100 grams sourdough starter, 540 grams warm water, and 50 grams honey.
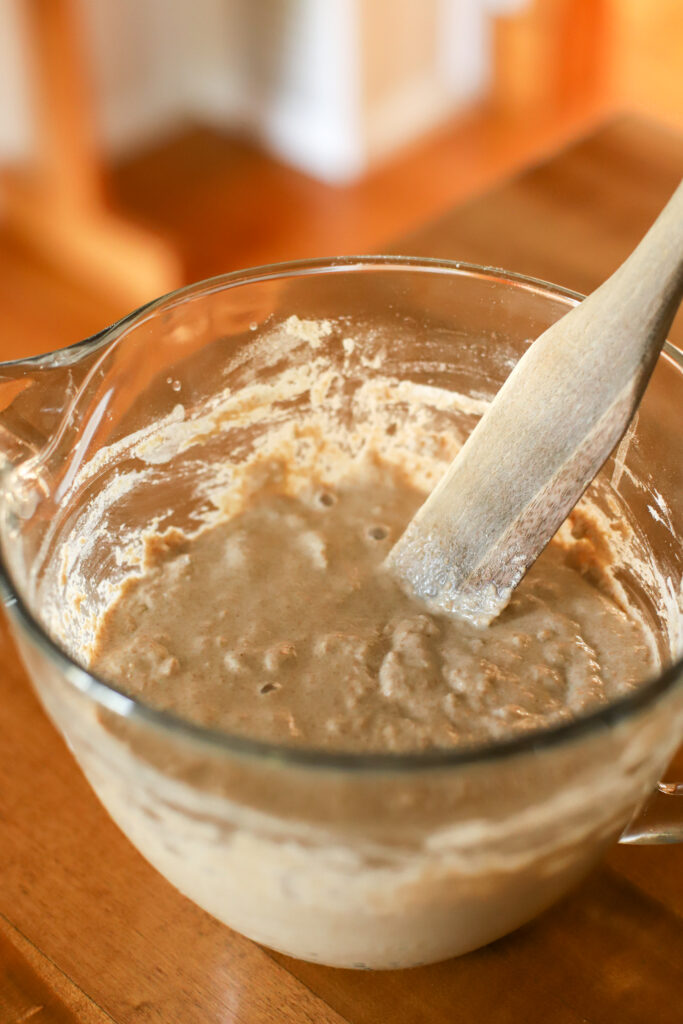
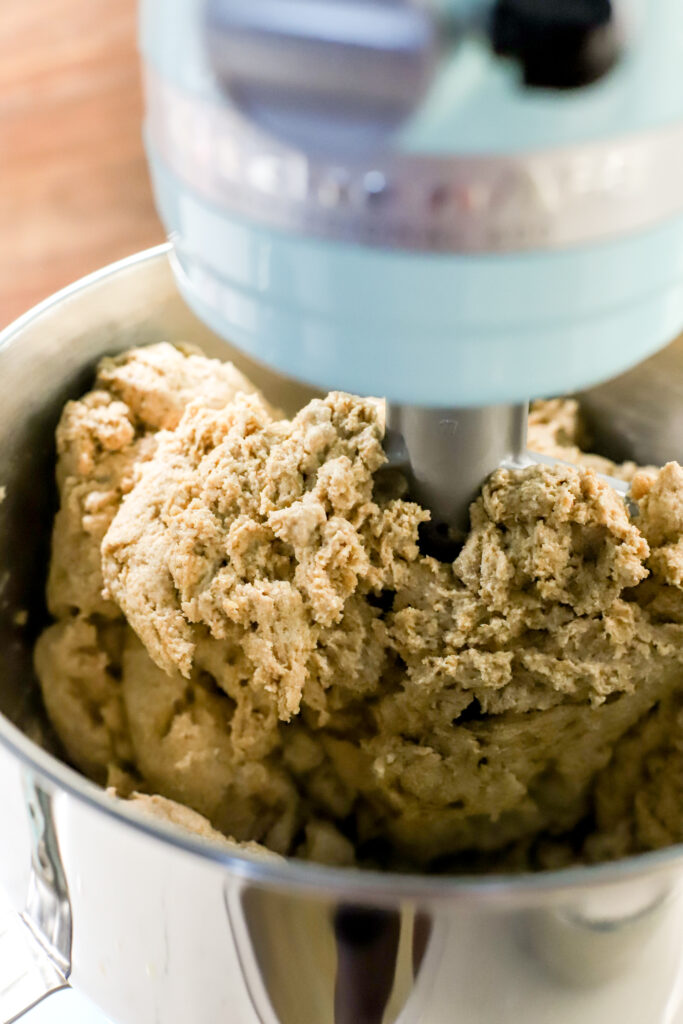
- Pour starter, water, honey mixture into dry ingredients and mix together using beater attachment until dough becomes shaggy (ingredients just come together).
- Remove beater attachment and replace with dough hook. Let dough rest 15 minutes.
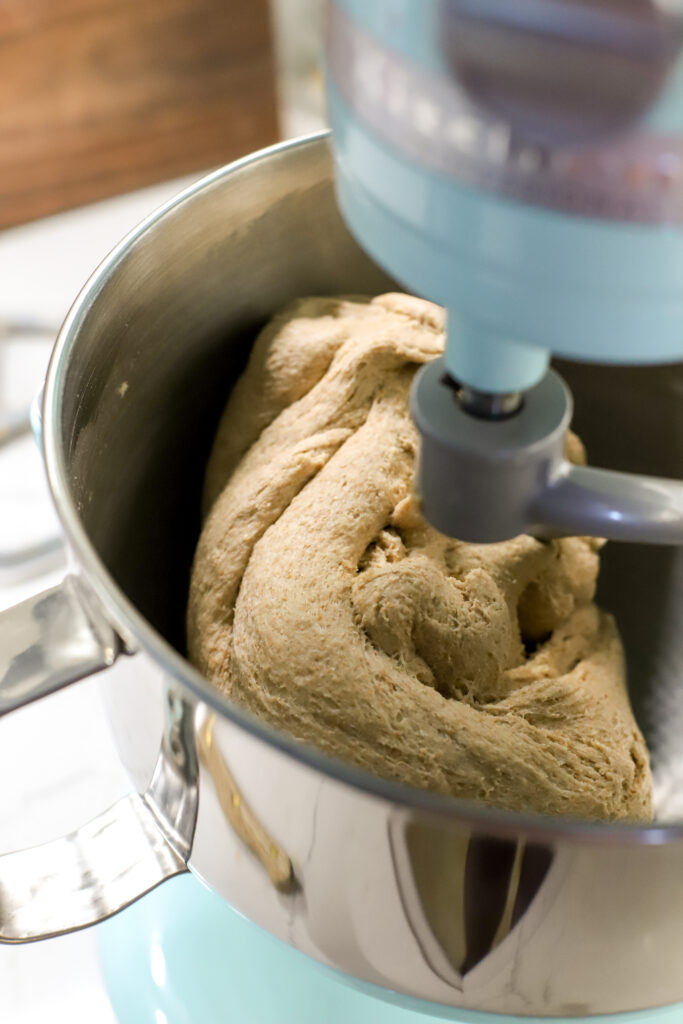
- After dough has rested, knead dough until dough is smooth and passes the windowpane test. Dough should be able to be pulled up without tearing. You want to be able to see through it as it thins. Think of it as a bread stained glass window!
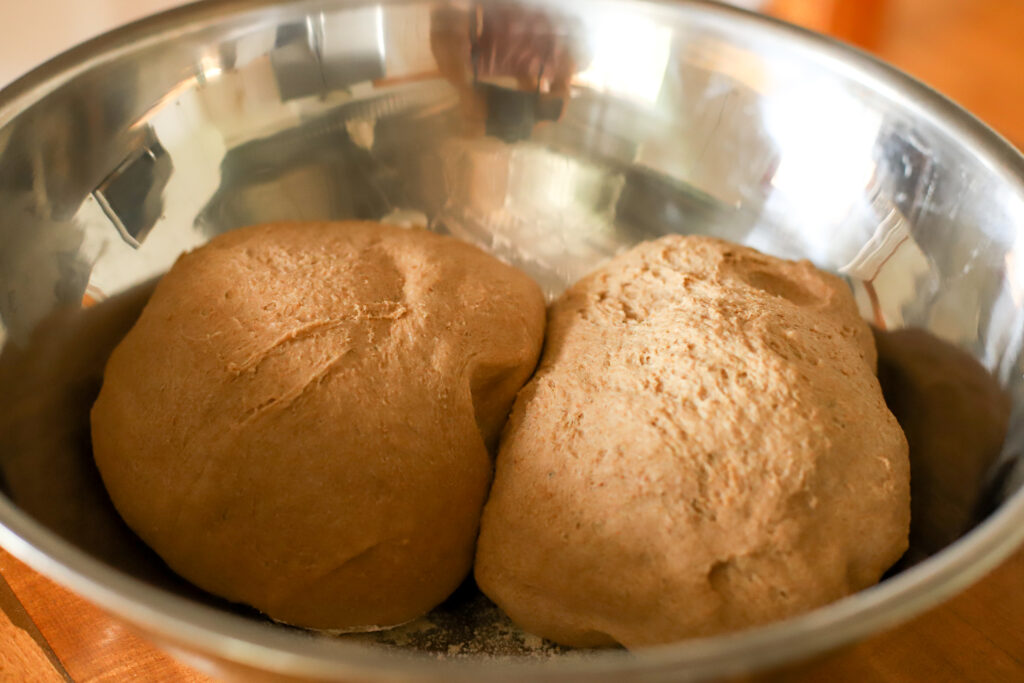
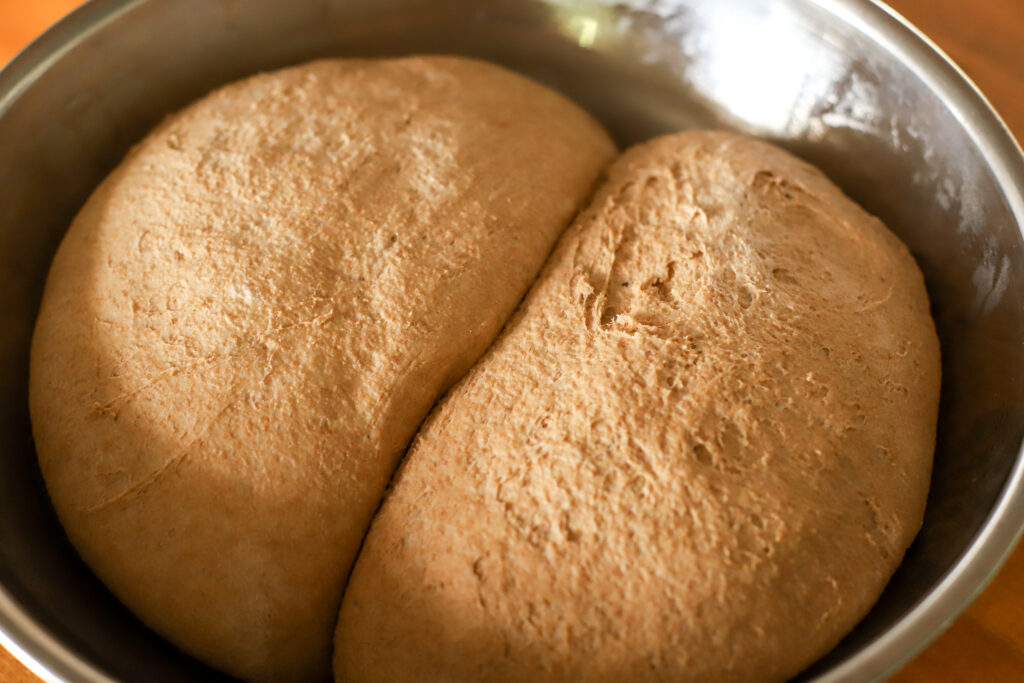
- Transfer dough to a large bowl to rise and cover it. Place dough in a warm but not hot location. Dough needs at least 8-12 hours to double in size. Bread can be made in the morning and baked at night or made at night an baked in the morning.
- Once dough has doubled, grease 2 bread pans.
- Preheat oven to 375 degrees.
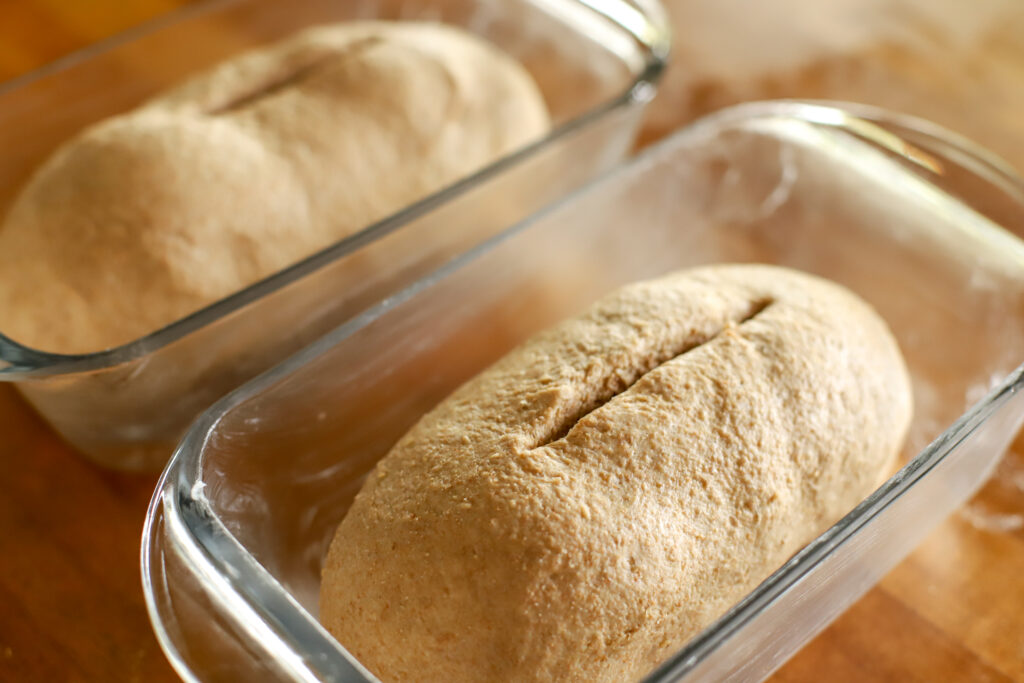
- Form dough into loaves. Place in bread pans and slice a slit on top. Cover and let loaves rest 1 hour. This step ensures loaves are nice and fluffy and not dense.
- Once dough has rested, bake at 375 degrees for 45-50 minutes or until top is golden brown.
- Immediately remove bread from pans and cool on wire rack.
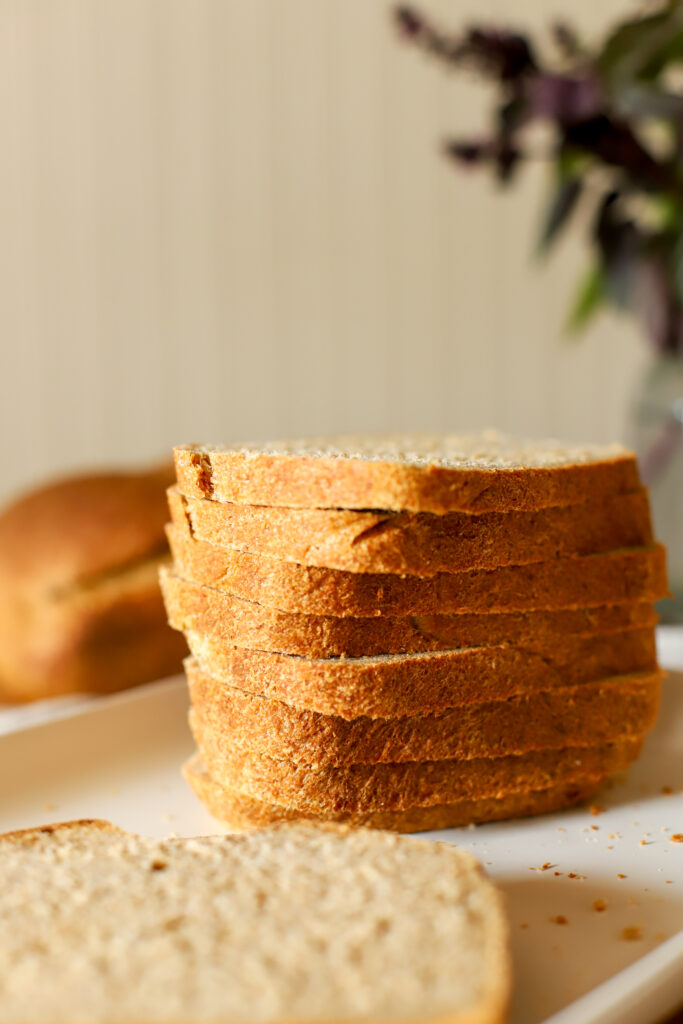
- When bread is fully cooled, slice and place in a freezer bag. I prefer pre-slicing so that I can use it at my convenience and it always stays fresh.
- If stored on the counter in an airtight container, bread is best used within a few days. I prefer storing my bread in the freezer until using as I make large batches at a time. It is not recommended to store freshly milled bread in the refrigerator as it tends to dry out quickly.
Choosing to make your own sandwich bread…
The choice to start making our own bread began several years ago. Slowly we began making all of our own food items, replacing what we once purchased at the store with whole and nourishing ingredients. This didn’t happen overnight though. It takes years of gaining skills before you feel confident to add another skill and especially another task to your to do list.
Choosing to make your own bread is definitely not convenient. Some may even think you are strange for wanting to take so much time making a loaf that you could easily purchase at the store for a few dollars. But the truth is, making your own sourdough bread is totally worth it. Slow down and appreciate the process. God created food to be nourishing to our bodies. In the hurry of our culture, we miss the beauty of the time and preparation it takes to make something nourishing.
And who doesn’t love coming home to the smell of fresh bread coming out of the oven?!

Join us for coffee on the porch!
Join us on the porch for our Substack newsletter and get our newest recipes straight to your inbox. This is a biweekly email for women, wives, and mothers who desire to cultivate homemaking skills, nurture healthy families through homegrown and homemade food, and grow in grace & godliness in the places God has us.
Why should you choose freshly milled flour?
God designed wheat berries to be nutrient dense and healthy for us to eat . The berries are whole, not separated and taken apart, until it is time to mill into flour. Each part – the bran, the germ, and the endosperm – have a vital role to play to not only nourish the body, but to also help the body to absorb all the nutrients.
Loaded with 40 of the 44 nutrients needed to sustain human life, grain in its whole form and freshly milled is a great source of vitamins, minerals, fiber, and protein. One of my favorite facts about freshly milled flour is that the fiber in it can survive the ride through the stomach and small intestine. This is great news because our long intestine is where many beneficial microbes live. Surviving the journey, this fiber is valuable food for our microbiome to feast on thus nourishing us and those good bugs at the same time! God you are good!
Wheat berries and conventional flour…
A wheat berry contains three parts; the Bran, the Germ and the Endosperm. Beginning in the early 1900’s researchers discovered that the bran and germ contained natural oils that caused flour to spoil. So they started to remove those parts and the birth of convenient and shelf stable, mass milling flour began. The bleached, brominated and enriched conventional flour boom took over. Families now desired pure white baked goods and this is how bleaching flour began. This birth of conventional flour removed all of the the bran and the germ, stripping it of vital nutrients their flour once had. To fix that problem they began enriching flour with synthetic vitamins.
Freshly milled flour vs. store bought flour
To summarize, when purchasing store bought whole wheat flour and unbleached white flour you will be using flour made from grain berries where the bran and the germ removed. All of the natural occurring enzymes, fiber and vitamins are now missing due to this separation process.
The bran and germ placed there by God were actually the most nutrient part and without those nutrients and enzymes present, people began suffering from nutritional deficiencies. I believe that removing these vital parts of the wheat has also led to people not being able to “tolerate” gluten leading to many of the bowel issues today.
Fresh milled flour uses the whole grain berry, intact and does not remove the fiber or the vitamins. It is simple, wholesome, delicious and nutritious.
Can you make sourdough from freshly milled flour?
A resounding YES! In fact, you will find that your sourdough starter absolutely loves freshly milled flour. The microbes in your happy sourdough starter will enjoy multiplying in such a nutrient dense environment!
What does freshly milled sourdough sandwich bread feel and taste like?
Texture:
Freshly milled flour made with whole grains will be heartier because they include the bran and the germ (the outer shell of the grain). Don’t assume you won’t like the heartiness before you try it. The “whole wheat” bread that your mom made you eat when you were a kid is nothing like the true whole wheat bread you will enjoy from freshly milled flour.
Freshly milled wheat has natural oils that do not leave your bread dry and tasteless. The finished product will be satisfying with depth and richness.
You can compare our Sourdough Sandwich Bread to Wonder Bread if you’d like to. While not as fluffy, it has a rustic made from scratch quality and a gooey “stick to the roof of your mouth after biting into a peanut butter and jelly sandwich” consistency.
Flavor:
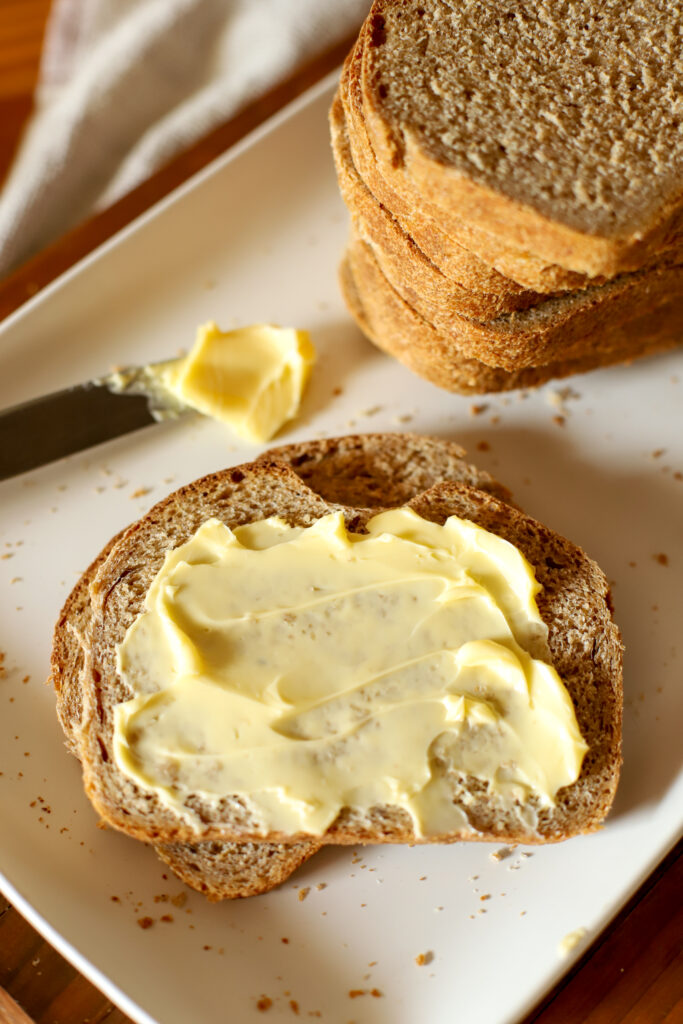
Freshly milled sourdough sandwich bread is the bread you want to eat on a winter day when you need a warm piece of bread smothered in butter and drizzled with honey. It satisfies the bread cravings you have deep down inside. This bread will not leave you disappointed!
Our recipe uses real butter and honey. This pairs so well with all the complexities of the flavors in real freshly milled wheat. And the coziness of honey is reminiscent of a honey wheat loaf.
Step-by-Step instruction to make freshly milled sourdough sandwich bread:
Ten steps to make freshly milled sourdough sandwich bread successfully!
- Step one: Make sure you have a happy sourdough starter, freshly fed and ready to start making delicious bread.
- Step two: Mill your grains. Weigh out all your dry ingredients and put them in the bowl of your stand mixer. Combine dry ingredients with butter.
- Step three: Add water, sourdough starter, and honey to dry ingredients. Mix until mixture is “shaggy” or just barely incorporated. Let rest 15 minutes.
- Step four: Put dough hook on mixer and knead dough until smooth. Check dough using the windowpane test- this means you can pull dough up and it does not tear, it just thins. Think of it as you’re looking through a stained glass window of dough.
- Step five: Let dough rest and rise covered in a warm location for 8 hours, overnight, or until dough has doubled in size.
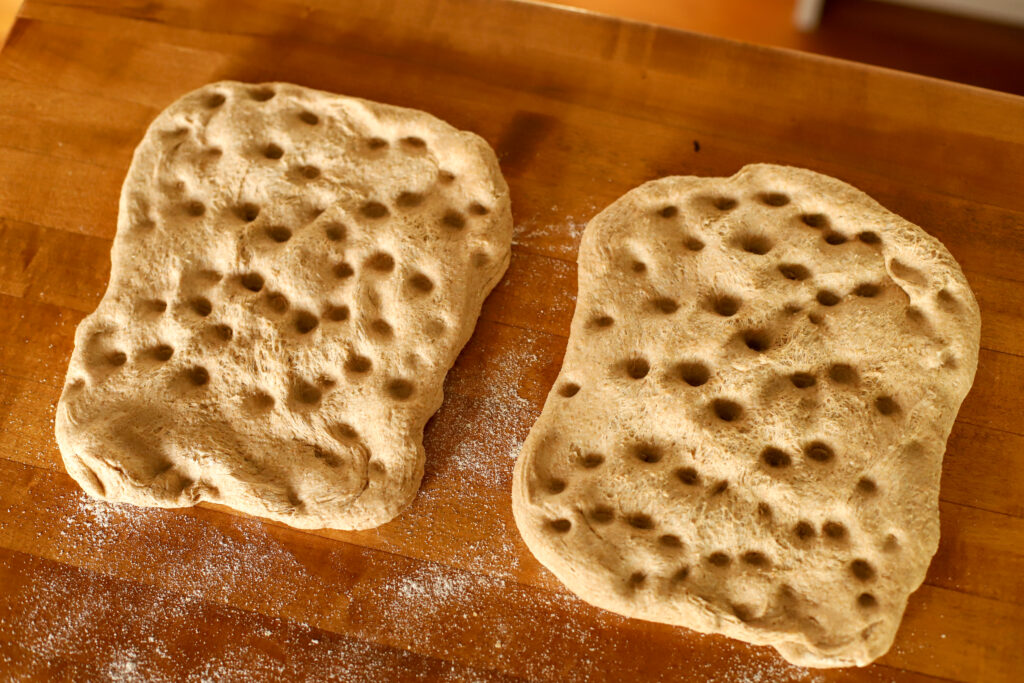
- Step six: Once dough has doubled, it is time to form them into loaves. Take dough and form into roughly an 8×10 rectangle. I like to poke it all around with my fingers to remove any air bubbles.
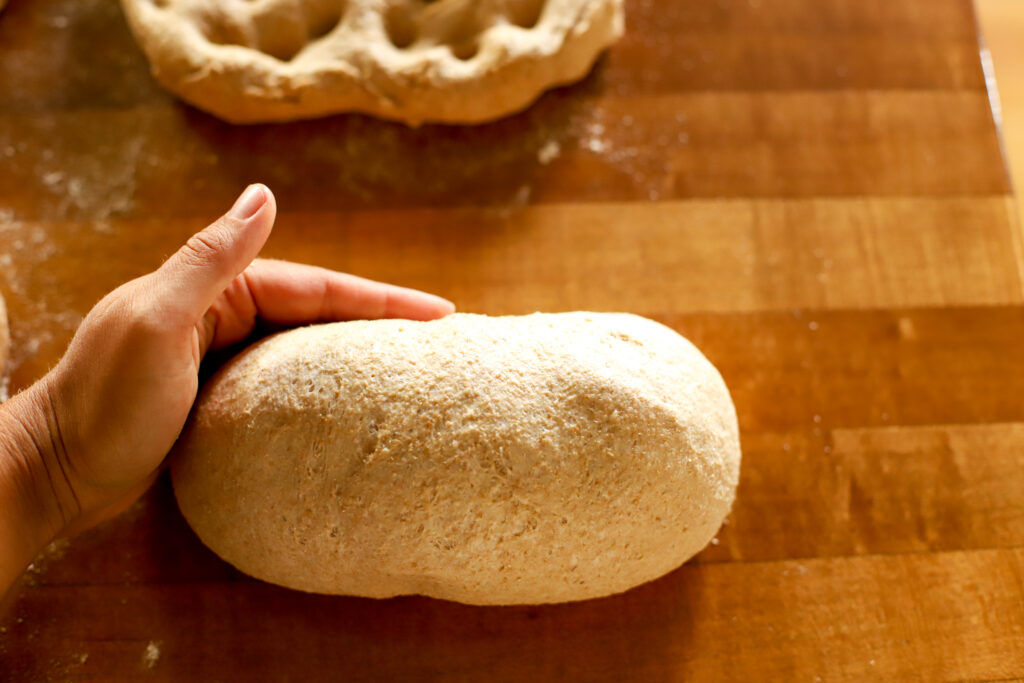
- Step seven: Then simply roll the loaves up, folding the ends in at the end. Once dough is in a loaf, gently pull dough towards you to tighten everything up. Note: this is my technique. You can make your loaves in whatever way makes sense to you. There are no rules here!


- Step eight: Place loaves in greased bread pans and slice an air gap on the top with a sharp knife. Cover loaves and let rest 1 hour. Loaves will stay fluffy and not become dense when baking.
- Step nine: Bake loaves at 375 degrees for 45-50 minutes or until golden brown on top.
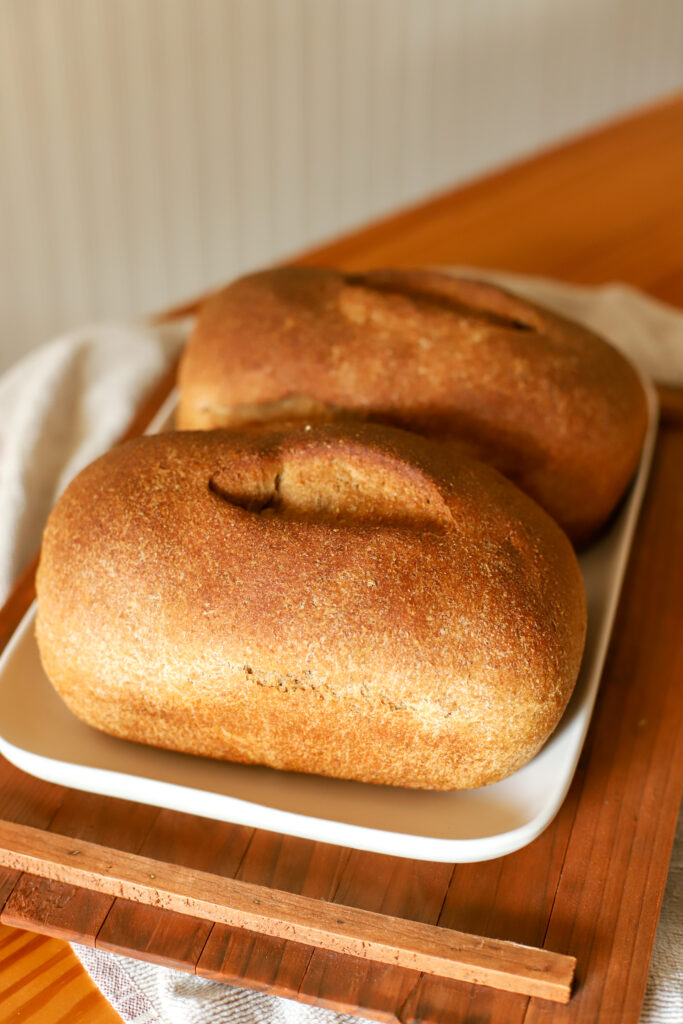
- Step ten: Remove bread from loaf pans and let cool on wire rack. Once cooled, I like to slice my bread and place it in a freezer bag. I usually make large batches of bread at a time. I double or triple this recipe. Then I keep my stash of sliced bread in the freezer until I’m ready to use it. This makes it so convenient to always have fresh bread!